The First 30 Days After a Home Remodel: Essential Watchpoints, Testing Protocols, and Documentation Strategies
The period immediately following a home remodel is not merely a return to normalcy; it is a crucial phase for ensuring the long-term quality, functionality, and satisfaction with the completed work. The first 30 days after a renovation serve as a critical window for homeowners to detect potential defects, thoroughly test new systems and fixtures, and carefully document all relevant project information. This proactive approach is vital not only for preventing minor issues from escalating into significant and costly repairs but also for safeguarding your investment and maximizing the "Joy Score" of your newly transformed space. With U.S. homeowners spending an estimated $603 billion on remodels in 2024, understanding this post-completion phase is more important than ever for protecting such a substantial financial commitment.
While a significant majority of homeowners express satisfaction with their remodels, common technical issues, particularly in plumbing (32% of reported problems) and electrical systems (21%), can emerge during this sensitive initial month. Beyond functionality, materials like paint, caulk, and grout require time to fully cure and settle, often revealing minor cosmetic flaws such as hairline cracks. Prompt identification and resolution of these issues, while still under contractor warranty, can save thousands in potential future expenses. This comprehensive report outlines strategic watchpoints, testing protocols, and documentation best practices for homeowners to navigate these critical first 30 days, ensuring their renovation delivers lasting value and peace of mind.
Key Takeaways for Your First 30 Post-Remodel Days:
- Early Detection is Key: The first month is critical for identifying potential issues, from minor cosmetic flaws to significant system malfunctions, minimizing future costs.
- Test Everything Thoroughly: Actively use and scrutinize all new fixtures, appliances, plumbing, and electrical systems to uncover hidden defects.
- Document Meticulously: Maintain a comprehensive record of all project details, warranties, and any identified issues (with photos and dates) for efficient problem resolution.
- Monitor for Water Leaks: Plumbing issues are common and can cause extensive, costly damage; check frequently for drips and dampness under sinks and around new connections.
- Understand Material Settling: Observe how new materials (paint, caulk, grout, wood) adapt to their environment, as minor changes and hairline cracks are common as they cure.
- Maintain Clear Communication: Keep an open and documented dialogue with your contractor about any concerns or required adjustments within the warranty period.
- Gentle Initial Maintenance: Protect newly installed finishes by following specific cleaning and humidity control guidelines during their curing phase.
1. Executive Summary
The period immediately following a home remodel is crucial for ensuring the long-term quality and satisfaction with the completed work. The first 30 days after a renovation serve as a critical window for homeowners to detect potential defects, thoroughly test new systems and fixtures, and carefully document all relevant project information. This proactive approach helps to prevent minor issues from escalating into significant and costly repairs later. The scale of the remodeling industry, with U.S. homeowners spending roughly $603 billion on projects in 2024[6], means that even a small percentage of defects can have substantial financial implications for both homeowners and contractors. Globally, rework and construction defects account for about 9% of total project costs, an estimated $625 billion annually[5].
While most homeowners express satisfaction with their remodels, with 81% reporting happiness or satisfaction (an average "Joy Score" of 8.2/10)[6], a notable minority face issues. Among those who experienced problems, 55.6% cited unmet expectations regarding workmanship quality, and 33.3% found the final result different from their vision[12]. Common technical trouble areas include plumbing (32% of reported issues) and electrical glitches (21%)[8]. Small cosmetic flaws, such as hairline cracks in caulk or grout as materials settle, are also frequent occurrences[1]. Actively observing, testing, and documenting these early signs allows homeowners to utilize contractor warranties and address problems while they are still manageable. For example, a hidden plumbing leak can lead to extensive damage; one homeowner’s new addition suffered $80,000 in damage due to an undetected pipe strain[4]. Water damage claims account for a substantial 38.2% of home insurance incidents and 42.4% of claim payouts in some markets[10], highlighting the financial severity of unaddressed water-related problems.
This executive summary outlines key insights derived from research regarding the importance of the first 30 days post-remodel. These insights focus on inspecting finishes, thoroughly testing systems, comprehensive documentation, gentle maintenance, and maintaining clear communication with contractors. Proactive engagement during this initial period benefits homeowners by preserving their investment and ensures satisfaction, while also supporting contractors through enhanced client trust and reduced liability.
Overview: Why the First 30 Days After a Remodel are Critical
The initial 30-day period following a home renovation is not merely a transition back to normal life; it is a vital phase for confirming the quality and functionality of the completed work. This timeframe is essential for detecting and addressing any latent issues that may arise as new materials settle and systems are put to use. Research consistently shows that small defects, if left unaddressed, can escalate into significant structural problems or costly repairs[1]. The objective of this critical period is to minimize future expenses and preserve the homeowner’s investment.
One of the primary reasons for the importance of this initial month is the nature of construction materials themselves. Finishes such as paint, caulk, grout, and various sealants require time to fully cure and stabilize[2]. During this curing process, minor changes may occur, including slight shrinkage or the appearance of hairline cracks. For example, hairline caulk cracks or minor leaks frequently surface as materials adapt to the ambient environment[1]. Similarly, newly installed wood elements, such as flooring or cabinetry, will acclimate to the home's humidity levels, potentially leading to minor expansion or contraction[2]. Prompt identification of these common and often cosmetic issues allows for timely rectification under warranty, preventing them from worsening or contributing to further damage.
Beyond cosmetic changes, the first 30 days are critical for uncovering functional defects in newly installed systems. Plumbing and electrical systems are particularly susceptible to issues that may not be immediately apparent upon project completion. Statistics show that plumbing issues are the most frequent technical problem reported post-renovation, accounting for 32% of complaints among homeowners who faced difficulties, followed by electrical glitches at 21%[8]. The gravity of plumbing defects is especially high due to the potential for water damage. Water-related incidents constitute the largest category of home insurance claims in some regions, making up 38.2% of claims and 42.4% of claim payouts by cost[10]. A small, undetected leak, such as a loose pipe fitting, can quickly cause extensive damage, as illustrated by a case where a new addition suffered $80,000 in damage from a hidden hot water line rupture[4]. Comprehensive testing of all new fixtures and systems, including flushing drains, running appliances, and checking electrical outlets, is therefore essential to detect such problems early and utilize contractor warranties.
The Stakes of Delayed Detection: Costs and Dissatisfaction
The financial implications of failing to identify and address deficiencies within the first 30 days are substantial. Rework and the rectification of incomplete items globally represent about 9% of total construction spending, translating to approximately $625 billion annually[5]. This figure underscores the economic burden of post-construction problems that could often be prevented or mitigated through early detection. For individual homeowners, neglecting minor issues can result in significant out-of-pocket expenses. A study found that 51% of homeowners unsatisfied with a remodel paid to correct errors, with over half spending up to $500, and 17% spending $500-$1000 more[13]. This highlights that addressing issues while under warranty can save homeowners thousands of dollars.
Beyond financial costs, delayed detection can lead to considerable homeowner dissatisfaction. While a large majority (81%) of homeowners are generally satisfied with their remodels[6], those who are not often cite poor workmanship or results that did not match their expectations as primary reasons[12]. These issues typically become evident during the initial weeks of living in the remodeled space. An average "Joy Score" of 8.2 out of 10 indicates high overall satisfaction, but the remaining percentage represents a pool of clients whose experiences could be improved by early issue resolution. Proactive identification and remediation of defects help ensure that the final remodel meets expectations, contributing to sustained satisfaction and trust in the contractor.
Strategic Elements for the First 30 Days
Effective management of the post-remodel period involves several strategic elements for both homeowners and contractors.
Inspect New Finishes and Materials
The "settling" period for materials right after a renovation means homeowners should conduct detailed visual inspections regularly. As paint dries fully, or as caulk and wood acclimate to humidity, tiny cracks, gaps, or imperfections can emerge[1]. For example, a hairline separation in caulk around a new tub or a nail pop on a freshly painted wall are common[2]. Documenting each issue with photos and dates is crucial to monitor if it worsens. Maintaining steady indoor humidity (around 40-50%) and consistent ventilation can minimize material movement and prevent problems like swelling wood or premature grout cracking[2]. This diligence allows homeowners to request free touch-ups under warranty and ensures the longevity of the remodel.
Test All Systems, Fixtures, and Appliances Thoroughly
The first month should be used to rigorously test every new or modified system. This includes frequently flushing toilets, running showers, filling and draining tubs, and using all new appliances through their full cycles[1]. Vigilant checks for leaks under sinks and adequate water pressure are important. Unusual noises, smells, or electrical trips should be immediately investigated. For instance, an Atlanta homeowner faced $80,000 in damages due to an improperly fitted hot water line, emphasizing the need for early detection[4]. Simple checks, such as placing paper towels under pipes to catch drips, can prevent extensive water damage[3]. Electrical outlets should be tested, and any new safety devices like smoke or carbon monoxide detectors should be verified for proper function.
Document and Organize All Remodel Information
Comprehensive record-keeping is a cornerstone of post-remodel management. Homeowners are advised to compile a "home file" containing all relevant documents, including contractor invoices, contact information, copies of permits, material specifications (e.g., paint codes, tile models), appliance manuals, and warranty cards[2]. Taking "after" photos of the completed work provides a baseline for future reference[2]. This documentation is essential for leveraging warranties and ensures that information is readily available for future maintenance or repairs. Reputable contractors, such as Phoenix Home Remodeling, provide clients with digital portals for accessing project documents and progress photos, streamlining this process[9]. A log of any issues reported, including dates and communications, creates a clear audit trail.
Embrace Gentle Maintenance and Environmental Control
New materials and finishes are susceptible to damage if not treated carefully during their initial curing period. Homeowners should use gentle cleaning methods and avoid harsh chemicals or abrasive tools on new surfaces for the first few weeks[1]. Maintaining stable indoor humidity, ideally between 35-50%, is crucial to prevent warping of wood products or excessive movement of finishes[2]. Proper ventilation, especially in kitchens and bathrooms, helps prevent moisture buildup and potential mold growth, as seen in a Hartford case study where inadequate exhaust led to persistent mildew[3]. Changing HVAC filters after construction dust settles and running air purifiers also contribute to a healthy post-remodel environment.
Communicate Issues Promptly and Leverage Warranties/Follow-Ups
Effective communication with the contractor remains important after the project is complete. Homeowners should report any issues as soon as they are noticed. Most contractors offer a warranty on their work, often one year for labor and materials, with some, like Phoenix Home Remodeling, extending labor warranties to two years[9]. Prompt reporting ensures that issues can be addressed under warranty, saving homeowners additional costs. Contractors who proactively follow up with clients post-project benefit from increased customer satisfaction, more referrals (double the rate for those who "close and forget"), and three times more positive reviews[11]. An exemplary case in Phoenix illustrated how a 30-day post-project walkthrough, addressing minor fixes and answering homeowner questions, fostered strong client relationships and generated referrals.
Conclusion: Long-Term Satisfaction and Value
The first 30 days after a remodeling project are a critical period that requires active involvement from homeowners and continued support from contractors. By treating this phase as an essential part of the project lifecycle, focusing on careful inspection, comprehensive testing, thorough documentation, gentle maintenance, and clear communication, the likelihood of long-term satisfaction and the preservation of the remodeling investment are significantly enhanced. This proactive approach helps to avoid costly repairs, mitigate potential safety hazards, and ensure that the remodeled space truly meets the homeowner's expectations and retains its value over time.
The insights from this executive summary will be further detailed in the subsequent sections, providing specific guidance for homeowners and contractors on managing this crucial post-remodel period efficiently and effectively.
2. Post-Remodel Inspection: Checking Finishes for Cracks, Gaps, and Imperfections
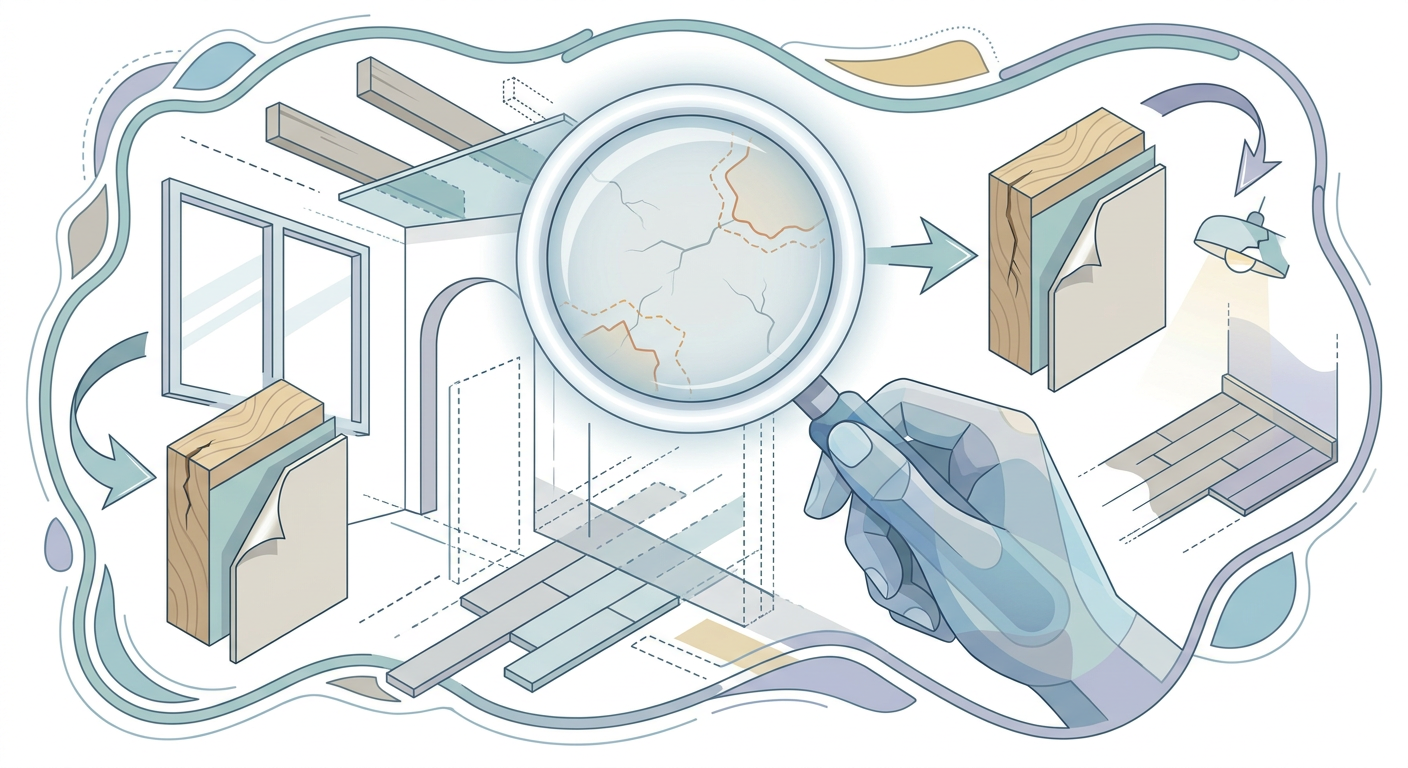
After a home remodeling project concludes, the initial satisfaction of seeing a renovated space can be very high, with 81% of homeowners reporting happiness or satisfaction with the outcome.[10] However, the period immediately following a remodel, specifically the first 30 days, is a critical time for inspecting the work. During this phase, new materials and finishes "settle" into their environment. This settling may reveal minor cosmetic flaws such as hairline cracks in caulk or grout, small gaps in trim, or other imperfections that were not apparent at the time of project completion.[1] These minor issues are normal occurrences. They stem from materials drying, shrinking, or expanding as they adjust to the home's ambient temperature and humidity.[5] While often cosmetic at first, neglecting these small problems can lead to more significant and costly repairs if left unaddressed. Early identification and documentation allow homeowners to leverage builder warranties and ensure that the finished work meets quality standards. This proactive approach helps secure the longevity and appearance of the remodel, maintaining homeowner satisfaction and preventing future headaches. The remodeling industry experiences substantial costs related to defects and rework, accounting for approximately 9% of total project costs globally, or about $625 billion annually.[5] A thorough post-remodel inspection by homeowners significantly reduces these costs by catching issues early when they are easier and cheaper to fix.
The importance of this initial inspection cannot be overstated, particularly when considering the significant financial investment in remodeling projects. In 2024, U.S. homeowners spent an estimated $603 billion on home remodeling.[6] With such large sums involved, ensuring the quality and durability of the work performed is essential. Problems are common in remodeling projects, with a 2022 survey indicating that 81% of homeowners encountered some issue during their renovation.[7] Among common complaints, unsatisfactory workmanship quality rated at 18%, and issues with plumbing or pipes were cited by 32% of homeowners experiencing problems.[7][8] These statistics underline the necessity of a systematic post-remodel inspection process. This section will explore the types of flaws to look for, the methods for documentation, and the importance of timely communication with contractors.
Examining New Finishes for Cosmetic Flaws
New finishes and materials, including paint, caulk, and grout, require close attention in the weeks following a remodel. These materials undergo a curing process, which can cause them to behave in ways not immediately visible upon completion. As they cure, they may exhibit slight shrinkage, expansion, or drying, leading to the appearance of minor cracks or gaps.[1][2] Homeowners should understand that some amount of settling is typical and does not always indicate poor workmanship. However, ignoring these signs can allow small issues to become larger problems later.[1]
Paint and Drywall
Fresh paint, while appearing smooth during the final walkthrough, may show inconsistencies as it fully dries and the underlying wall materials settle. One common issue is the appearance of "nail pops," which are small bulges or cracks that may form on drywall where nails or screws have been used. These happen as wood framing dries out and shifts slightly, pushing the fastener against the drywall.[5]
- What to look for:
- Hairline cracks, especially near corners, ceilings, or door and window frames.
- Nail pops or screw heads showing through painted surfaces.
- Uneven texture, bubbling, or peeling paint in localized areas.
- Color inconsistencies, particularly if touch-ups were done without proper blending.
- When to inspect: Regularly during the first 30 days, as environmental changes (temperature, humidity) can trigger these imperfections.
- Documentation: Take clear, well-lit photographs or videos. Note the location, date of discovery, and any estimated dimensions of the flaw.
Caulk and Grout
Caulk and grout are sealants that are crucial for moisture protection and aesthetic appeal, particularly in bathrooms and kitchens. As they cure, these materials can shrink. This shrinkage may create hairline cracks or separation from adjoining surfaces.[1] For example, a new caulk bead around a bathtub or sink may pull away from the fixture or wall, creating a small gap. Similarly, grout lines between tiles can develop minor cracks.[1]
- What to look for:
- Hairline cracks in grout lines, particularly in high-traffic areas or areas with temperature fluctuations (e.g., shower walls).
- Separation of caulk from surfaces it seals (e.g., around sinks, bathtubs, countertops, baseboards).
- Discoloration or crumbling of grout.
- Water pooling in areas where caulk or grout should prevent it.
- When to inspect: Daily for the first week, then weekly for the remainder of the month. Use and clean these areas normally to see how the seals perform under routine conditions.
- Documentation: Close-up photos showing the extent of the cracks or gaps. For caulk separation, gently test the seal with a finger to assess its integrity.
Flooring and Woodwork
New flooring, especially hardwood, and woodworking elements like baseboards, trim, and cabinetry, are sensitive to changes in humidity and temperature. Wood naturally expands and contracts.[9] This movement can cause gaps or misalignment.
- What to look for:
- Gaps between flooring planks or tiles that were not present originally.
- Separation of baseboards or crown molding from walls.
- Cabinet doors or drawers that stick, sag, or do not close properly.
- Minor warping or cupping of wood surfaces.
- When to inspect: Monthly, paying attention to changes in different seasons if the remodel finishes before major seasonal shifts.
- Documentation: Note any areas of concern. For doors and drawers, record if they stick or are misaligned.
Other Finishes and Fixtures
Beyond typical surfaces, other elements of a remodel may show imperfections as they settle. This could include issues with new railings, light fixtures, or even minor problems with appliance installations.
- What to look for:
- Loose hardware on new fixtures (e.g., handles, knobs).
- Scratches or dents that were overlooked in the final walkthrough.
- Misaligned switch plates or outlet covers.
- Doors that rub against frames or floors.
- When to inspect: Regularly during daily use.
- Documentation: Note details such as location and specific issues.
The aggregate cost of fixing errors and incomplete work is about 9% of total construction spending globally. This is an estimated $625 billion annually.[5] Catching these minor cosmetic flaws early, when they are easier to rectify, can help minimize these costs for both the homeowner and the contractor. A contractor who addresses these small issues promptly demonstrates a commitment to quality and customer satisfaction.
Humidity Control and Material Curing
The environment of a home plays a significant role in how new materials settle. The first 30 days after a remodel, often termed a “protect the finish” phase, are when many materials like paint, grout, and caulk continue their curing process.[2] During this time, materials are more susceptible to environmental factors, especially humidity and temperature fluctuations. Large swings can exacerbate material movement, leading to issues like drying and cracking.[9]
Impact of Humidity
New wood elements, such as flooring, cabinetry, and trim, are particularly sensitive to moisture content in the air. If the indoor relative humidity changes significantly-for example, from a very dry construction environment to a more humid living space-wood can expand or contract. This movement can result in visible gaps between wood components or even cause surfaces to cup or warp. Consistent humidity levels, ideally between 35-50%, are recommended to reduce these effects.[9] For instance, using exhaust fans in kitchens and bathrooms helps control localized humidity from showering or cooking. In areas with naturally dry or humid climates, homeowners might consider a humidifier or dehumidifier to maintain stable indoor conditions.
Curing Processes
Beyond wood, other materials also cure. Paint fully hardens over several weeks. During this time, it is more delicate and can be damaged by harsh cleaning. Grout also takes time to reach its full strength and moisture resistance. A newly grouted shower might become vulnerable to mold or water penetration if used heavily and not allowed to dry properly. Caulk forms a waterproof seal, but its flexibility and adhesion can be compromised if it cures under stressful conditions, such as extreme temperatures or rapid humidity changes.
Proper ventilation is one key aspect of aiding the curing process and maintaining air quality. New paint and cabinetry can release Volatile Organic Compounds (VOCs) during their initial drying period. Opening windows and using exhaust fans can help dissipate these compounds.[4] This also helps moisture escape, which is especially important for paint and other water-based finishes.
One notable example of environmental control issues is from Hartford, CT, where homeowners of a recently remodeled bathroom experienced persistent mildew on new caulk and ceilings.[3] The issue stemmed from an inadequate exhaust fan and ducting, which failed to remove sufficient moisture. This case highlights how critical proper ventilation is. The problem was resolved by upgrading the ventilation system, preventing recurrence of the mildew.[3] This illustrates that performance issues, not just cosmetic ones, can surface quickly if environmental controls are not sufficient. Early detection of such problems allows for fixes under warranty, preserving the remodel's quality and the homeowner's health.
Documentation and Communication
Effective documentation and clear communication with the contractor are essential for managing post-remodel issues. The "first 30 days" serve as a critical period during which homeowners should diligently record any noticed flaws and promptly report them. This process helps ensure that issues are covered under warranty and are resolved efficiently.
Creating a Comprehensive Record
A "home file" containing all relevant project information needs to be compiled. This file should include:[2]
- Contractor Information: Original contract, invoices, contact details, and warranty terms. Phoenix Home Remodeling, for instance, offers a 2-year labor warranty against the industry standard of one year.[9] Such details empower homeowners to request necessary corrections.
- Material Specifications: Exact paint colors (including brand and finish), tile make and model, grout color, and any other specific finish details. This information is vital for future touch-ups or repairs.
- Appliance Manuals and Warranties: All manuals, installation guides, and warranty cards for new appliances and fixtures. Registering these products helps ensure coverage.
- "After" Photos and Videos: Detailed photographs and videos of the completed work, documenting its initial appearance. These serve as a baseline for comparison if future issues arise.[2] Phoenix Home Remodeling offers a remodel portal where clients can access project photos and documents, which aids in compiling these records.
- Issue Log: A written log of all observed imperfections, including the date discovered, a detailed description, and photographic evidence. This log creates a clear historical record for discussions with the contractor.
Prompt Communication with Contractors
Once an issue is identified, it needs to be reported to the contractor without delay. Reputable contractors expect and even encourage this feedback. Many plan for a "punch list" follow-up visit a few weeks after the project completion to address minor adjustments.[1] This proactive approach benefits both parties. For the homeowner, it means timely fixes and minimal disruption. For the contractor, it minimizes the risk of small problems escalating into larger, more expensive claims or negative reviews. Companies that conduct post-project follow-ups see three times more Google reviews and twice as many referrals.[11]
Consider the Calgary kitchen remodel example, where a homeowner noticed a slight drip under a new sink using a paper towel test. The contractor was called immediately, and the issue (a loose compression fitting) was fixed the next day without any damage.[4] This prompt action also saved the homeowner from potential water damage but also built trust, leading to positive client feedback. This illustrates how small, prompt actions can avert major expenses and foster strong customer relationships.
A contrasting case is Jenny Warner's Atlanta home addition, which suffered $80,000 in water damage due to an improperly fitted hot water line.[4] The problem was not detected until slight floor warping appeared weeks later, by which time significant structural damage had occurred. This example underscores the importance of both vigilant inspection and the potentially devastating financial consequences of delayed detection. Had a small, early sign been caught, such extensive damage could have been avoided.
Leveraging Warranties
Most remodeling work includes a warranty, typically one year on workmanship and materials. Some contractors, like Phoenix Home Remodeling, provide an extended 2-year labor warranty.[9] Knowing the terms of these warranties is crucial. Homeowners must report issues within the specified timeframe to ensure free repairs. Documentation of issues (date, photos, communication) is vital to support any warranty claim. This evidence proves the problem was identified and communicated while the warranty was active.
The process of addressing flaws in the first 30 days is a final opportunity to refine the remodel. By conscientiously inspecting, documenting, and communicating, homeowners protect their investment and ensure the work stands the test of time, supported by their contractor's commitment to quality. The high cost of rework and disputes in the construction industry highlights the value of this early attention to detail. Ignoring issues can lead to homeowners paying for corrections out-of-pocket, with over half of dissatisfied Russian homeowners spending up to $500 for post-remodel repairs.[13] Timely action under warranty is a far more favorable outcome.
The next section will detail thorough systems checks, focusing on plumbing, electrical, and appliance functionality to identify any active mechanical or operational issues.
3. First 30 Days Systems Check: Testing Plumbing, Electrical, and Appliances After a Remodel
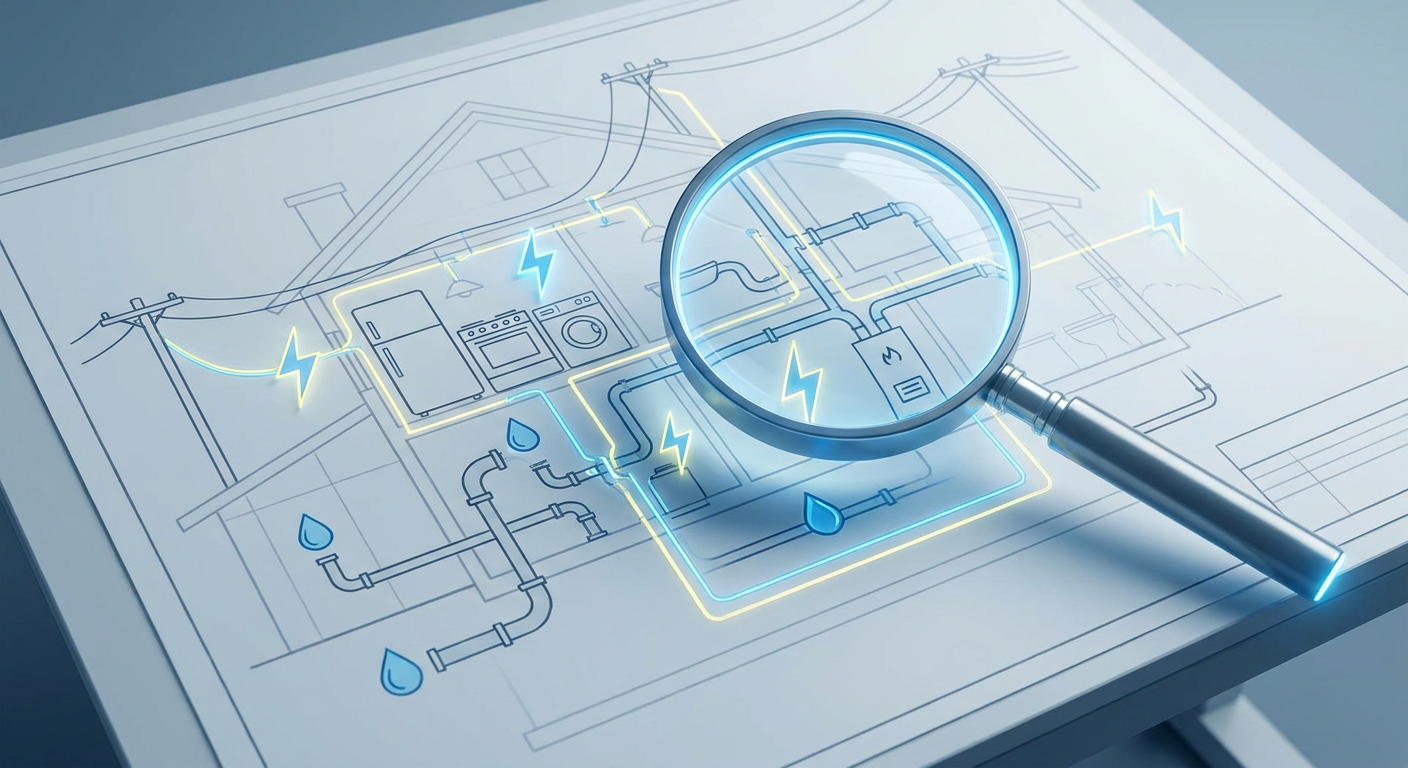
The period immediately following a home remodel is crucial for ensuring the durability and proper function of new installations. While the visual completion of a project brings relief and excitement, the initial 30 days present a vital window for detailed inspection and testing. During this time, newly installed systems, fixtures, and appliances are used for the first time by occupants. This daily use often reveals small issues that were not apparent during a final walkthrough. Missing these early signs can lead to significant problems, particularly with plumbing and electrical work, which are frequent sources of post-remodel complaints and costly damage.
Remodeling projects represent a substantial investment for homeowners. In 2024, approximately $603 billion was spent on home remodeling in the U.S. alone[6]. Given this scale, even a small percentage of defects can translate into billions of dollars in rework costs. Globally, construction defects and rework account for approximately 9% of total project costs, an estimated $625 billion annually[5]. Many of these costs could be prevented by early detection and resolution of issues. This section will explore the necessity of thoroughly testing all new fixtures, systems, and appliances, focusing on how proactive checks can prevent common post-remodel problems like water damage and electrical faults. It will also cover the importance of documentation and communication in safeguarding a homeowner's investment.
The Criticality of Early Detection for Plumbing and Electrical Issues
During the first month after a remodel, various materials settle and adjust to the home's environment[2]. Small cosmetic issues, such as hairline cracks in caulk or grout lines, often emerge as part of this natural settling process[1]. While these are relatively minor, they are indicators that closer inspection of other systems is warranted. More significantly, underlying functional problems in plumbing and electrical systems can surface during this period. Surveys show plumbing or pipe issues affect 32% of homeowners who experienced problems with their remodel, making it the most common technical issue[8]. Electrical glitches are also frequent, impacting 21% of these homeowners[8].
Water leaks are a particularly severe concern, capable of causing extensive and costly damage. Hidden plumbing leaks can result in substantial monetary losses if not detected promptly. For example, one homeowner's new addition incurred $80,000 in damage due to an undetected pipe strain near a main shower valve[4]. It was discovered only when floorboards began to warp weeks after completion[4]. This highlights how small installation errors can lead to catastrophic consequences. Water damage is a leading cause for home insurance claims, accounting for 38.2% of incidents in some regions and over 42% of total claim payout costs[10]. This emphasizes the financial risks associated with undetected leaks.
Electrical issues, while sometimes less dramatic than a burst pipe, can pose fire hazards or cause frequent disruptions. Testing all new electrical outlets and switches for proper function and wiring is an essential safety measure. These early checks also identify defects but also ensure that any needed repairs can be covered under contractor warranties, which typically range from one year for workmanship to longer periods for specific manufacturers' products[7]. Proactive resolution of these matters safeguards the homeowner's financial resources and the property's integrity.
Comprehensive Testing Protocols for New Systems
A structured approach to testing systems, fixtures, and appliances in the debut month after a remodel is critical. This systematic verification ensures that everything functions as intended and helps pinpoint potential defects before they escalate. Homeowners should treat this phase as an active period of evaluation rather than passive enjoyment.
Plumbing Systems: Checking for Leaks and Proper Drainage
For any area with new plumbing - kitchens, bathrooms, laundry rooms - a thorough check for leaks and efficient drainage is non-negotiable. This involves:
- Fixtures: Turn on every faucet (hot and cold), shower head, and tub filler to full pressure. Let the water run for several minutes. Observe water pressure, temperature consistency, and flow. Do not assume; verify.
- Drains: While water is running, observe all drains for proper function. Does water drain quickly without pooling? Are there any gurgling sounds, which might indicate venting problems? Flush all toilets multiple times.
- Under-Sink Checks: After running water, carefully inspect the area under sinks, behind toilets, and around appliance connections (dishwashers, washing machines, refrigerators with ice makers) for any signs of moisture. Placing a dry paper towel under pipes and connections can help detect even the smallest, slowest drips[3]. Check these paper towels daily for the first week.
- Appliance Cycles: Run dishwashers through a full cycle. Do a load of laundry in a new washing machine. Observe for proper filling, draining, and any leaks.
- Hot Water: Test the hot water supply at all new fixtures. Ensure enough hot water is available and that the temperature is consistent.
The goal is to simulate normal, heavy use. A small, often invisible, leak can silently cause significant damage over time. The $80,000 water damage case in Atlanta originated from an improperly drilled hot water line, which slowly leaked and saturated the structure[4]. Early and frequent checks can prevent such outcomes, as demonstrated by a Calgary homeowner who averted costly damage by detecting a loose compression fitting under a new sink in the first week, using the simple paper towel method[14].
Electrical Systems: Verifying Safety and Functionality
New electrical installations or modifications also require rigorous testing to ensure safety and functionality. Electrical issues account for 21% of homeowner problems after a remodel[8].
- Outlets: Test every new electrical outlet using a small appliance or a dedicated outlet tester (which can check for correct wiring, grounding, and polarity). Pay special attention to GFI (Ground Fault Interrupter) outlets in bathrooms, kitchens, and outdoor areas; press the "test" and "reset" buttons to ensure they trip and reset correctly.
- Switches and Lighting: Turn on and off every new light fixture and switch. Test dimmer switches for proper functionality across their full range.
- Appliances: Ensure all new electrical appliances (oven, microwave, range hood, disposal, etc.) power on and function through their various settings. High-power appliances should be tested to ensure they do not trip circuit breakers under load.
- Circuit Breaker Panel: If new circuits were added, verify they are properly labeled in the electrical panel. Note if any breakers trip frequently when new appliances or electronics are in use-this could indicate an overloaded circuit or a fault needing attention.
- Safety Alarms: If smoke or carbon monoxide detectors were upgraded or installed as part of the remodel, test their alarms.
Discovering a reversed polarity on an outlet or a frequently tripping breaker during the initial 30 days allows the electrical contractor to address it promptly and under warranty, preventing potential safety hazards or nuisance issues in the future.
Appliance Functionality: Beyond the Initial Power-Up
Modern appliances come with many features. Simply confirming they turn on is not enough. Homeowners should:
- Test all modes: For ovens, test both bake and broil functions at various temperatures. For refrigerators, check temperature settings and ice maker function.
- Verify settings: Ensure programmable features and smart home integrations work seamlessly.
- Listen for abnormal sounds: Any unusual noises, vibrations, or smells when an appliance is running could indicate an installation issue or a faulty unit.
- Check for leaks (again): For water-using appliances (dishwasher, refrigerator with water dispenser, washing machine), visually inspect for leaks during and after operation.
This detailed testing confirms that the appliances are also correctly installed but also fully operational according to manufacturer specifications. Early testing also provides the opportunity to engage manufacturers' support or local repair services if the appliance itself is defective, often covered by product warranties.
The table below summarizes common issues and testing methods for various systems.
| System/Area | Common Post-Remodel Issues | Testing Method in First 30 Days |
|---|---|---|
| Plumbing (Faucets, Showers, Toilets) | Leaks (under sinks, around toilets, behind walls), low water pressure, slow drainage, gurgling sounds, temperature inconsistencies | Run all fixtures hot/cold, check pressure. Flush toilets multiple times. Inspect pipe connections for drips (use paper towels under sinks). Listen for unusual sounds. |
| Water-Based Appliances (Dishwasher, Washing Machine, Fridge Ice Maker) | Leaks at connections, improper filling/draining, operational failures | Run full cycles for dishwasher/washing machine. Test ice maker/water dispenser. Visually inspect all hose connections for moisture during and after use. |
| Electrical (Outlets, Switches, Lighting) | Non-functional outlets, reversed polarity, tripping breakers, faulty dimmer switches, flickering lights | Test every outlet with an appliance/tester. Flip all switches. Test GFI outlets. Use high-wattage devices briefly to check for breaker trips. |
| Cooking Appliances (Oven, Microwave, Range) | Temperature inaccuracies, uneven cooking, functional failures | Test all heating elements, oven modes (bake, broil, convection), fan. Set oven to high temperature. Verify microwave heats evenly. |
| HVAC/Ventilation (Exhaust Fans) | Ineffective moisture removal, persistent humidity, unusual noise | Run exhaust fans during showers/cooking. Check for condensation on mirrors/windows. Listen for fan noise. |
| Safety Devices (Smoke/CO Detectors) | Non-functional, improper installation, alarm malfunctions | Press "test" button on all detectors to confirm alarm sound. |
Documentation and Warranty Utilization
Thorough documentation is an essential aspect of the post-remodel process. It acts as a safety net, protecting the homeowner's investment and facilitating future repairs or warranty claims. Homeowners should create a "home file" immediately after the remodel to store all relevant information[2]. This file should include:
- Contractor Information: Including contact details, dates of service, and copies of the original contract.
- Invoices and Receipts: For all materials and services.
- Material and Finish Details: Brands, models, color codes (e.g., paint, tile, grout), and suppliers[2]. This information is needed for touch-ups or repairs, such as replacing a broken tile.
- Appliance Manuals and Warranty Cards: Many appliances require registration with the manufacturer to activate full warranty coverage. Early registration is a small but important step.
- Warranty Information: Both for contractor workmanship and individual products. Standard workmanship warranties are often 1 year[7], although some companies, like Phoenix Home Remodeling, offer extended coverage such as a 2-year labor warranty[9].
- "Before and After" Photos: These provide visual proof of the completed work and can be valuable if any disputes arise later regarding the condition of a feature.
- Maintenance Guidelines: Any specific instructions provided by the contractor or manufacturer for the care of new materials.
- Permit Information: If permits were required, copies of inspection approvals and final sign-offs should be retained.
Phoenix Home Remodeling, for example, provides clients with access to a remodel portal where they can access progress photos and documents, allowing them to download final plans or specifications for reference[33] [34]. Such digital solutions make documentation easier for homeowners. When an issue is discovered, documenting it immediately with date-stamped photos and a written description is crucial. This creates a clear record that the problem was identified within the warranty period, strengthening any claim made to the contractor or manufacturer.
The Role of Communication and Follow-Ups
Effective communication with the remodeling contractor throughout the first 30 days is just as important as the physical inspections. Homeowners should not hesitate to report any concerns, however small, as soon as they are noticed. Legitimate issues are typically covered by the contractor's warranty or guaranteed by their commitment to quality. Prompt communication allows the contractor to address problems while they are still minor, preventing them from escalating into more complex and costly repairs.
Reputable remodeling firms often conduct post-project follow-ups. Some schedule a 30-day or 3-month check-in to ensure client satisfaction and address emerging issues[11]. This proactive approach also resolves minor defects but also significantly increases client satisfaction and referral rates. Companies that implement post-project follow-ups see three times more positive Google reviews and double the referrals compared to those that do not[11]. This practice benefits both parties: the homeowner receives timely fixes, and the contractor builds a stronger reputation and client loyalty.
If a contractor does not initiate a follow-up, homeowners should feel empowered to request one. Walking through the remodeled space with the contractor or project manager to point out observed issues is an effective way to address them. These issues could range from a cabinet door that scrapes to a tile with a hairline crack developed after several weeks. Resolving these issues early reinforces the quality of the project and helps avoid later disputes.
Avert Potential Hazards: Case Studies
The consequences of neglecting systematic checks and communication in the first 30 days can be severe, as shown by various real-world scenarios:
- Atlanta Plumbing Disaster: An interior designer in Atlanta experienced a $80,000 loss after a new bathroom addition suffered a severe leak from an improperly drilled hot water line[4]. The pipe strain eventually caused a rupture, and the water saturated foam insulation and ceilings in areas below the addition. The delay in discovering the leak led to extensive damage, requiring a complete gut and redo of the new bathroom. This specific incident illustrates that even with interim inspections during construction, faulty work can go unnoticed. The homeowner stated she felt "completely sick" about the damage[4]. Had proactive checks been performed, including early and repeated visual inspections, the severe damage might have been reduced or avoided.
- Calgary Kitchen Success Story: In contrast, a homeowner in Calgary, following contractor advice to be vigilant, identified a small leak under her new sink within a week of kitchen remodel completion[14]. By placing a paper towel under the U-bend, she noticed a crescent of water. Her contractor addressed the loose fitting the very next day, preventing any damage and solidifying client trust. This positive outcome demonstrates the power of simple, early detection methods and responsive contractor service.
- Hartford Bathroom Mold: In Hartford, a family renovated their main bathroom and noticed persistent black spots of mildew on new caulking and the ceiling after the remodel[3]. Despite cleaning, the mildew returned quickly, indicating an underlying moisture issue. Investigation revealed that the new exhaust fan was undersized and its duct run inefficient, failing to vent steam. The contractor upgraded the fan and re-caulked, resolving the problem. This illustrates how functional issues, such as inadequate ventilation, can quickly lead to health hazards and damage, and how early symptoms (like recurring mildew) are crucial indicators for prompt action.
These examples highlight the diverse range of problems that can arise and the critical role of proactive engagement by homeowners and contractors in the first month following a remodel. Timely identification and resolution are key to preserving the quality and longevity of the renovation.
Conclusion
The first 30 days after a home remodel is a vital period that demands close attention to detail from both homeowners and contractors. This initial month is not merely a post-completion formality but a critical phase for identifying and resolving potential issues before they become expensive problems. Thoroughly testing all new plumbing, electrical systems, and appliances; carefully inspecting finishes for settling-related imperfections; and carefully documenting all project details are essential steps. Active communication with the contractor and a clear understanding of warranty terms further protect the homeowner's investment.
The financial implications of neglecting this period are significant, with rework costs reaching billions globally, and water damage being a leading cause of home insurance claims. Homeowners who proactively engage during these initial weeks ensure that their remodeled space functions safely and reliably for years to come. For contractors, fostering a culture of vigilant follow-up and timely issue resolution enhances client satisfaction, builds trust, and earns valuable referrals. Ultimately, treating the first 30 days as an extended quality control phase translates into a more successful and satisfying remodeling experience for everyone involved.
Following this detailed systems check, the next section will explore into the visual inspection of detailed finishes, focusing on how to spot and address cosmetic imperfections that often become apparent after materials settle.
4. Post-Remodel Paperwork: Warranties, Manuals, and Photos - How to Document Your Project
The completion of a home remodel marks a significant milestone. The dust has settled, the contractors have packed up, and a freshly updated space stands ready. While the construction phase is over, the homeowner's involvement in the project, particularly in its initial 30 days, remains active. This immediate post-remodel period is critical for protecting the investment. It involves careful observation, thorough testing of new systems, and careful documentation of all project-related paperwork and visual evidence. This documentation extends far beyond simply admiring the finished look; it involves organizing warranties, collecting appliance manuals, and capturing detailed "after" photos. These tasks are not merely administrative; they are essential for future maintenance, potential repairs, and making warranty claims. Without proper documentation, homeowners can face considerable challenges and expenses if issues arise later on.
The scale of remodeling activity in the United States alone demonstrates the importance of this phase. In 2024, American homeowners spent approximately $603 billion on renovation projects, with 42% of contractors reporting increased project volumes in the preceding two years[6]. Such a substantial financial commitment makes it imperative to safeguard that investment. A significant portion of this spending is at risk: construction defects and rework account for approximately 9% of total project costs globally, an estimated $625 billion per year in lost value[5]. Many of these issues can be avoided or mitigated through diligent post-completion checks and careful record-keeping. While most homeowners are happy with their remodel outcomes (an average "Joy Score" of 8.2 out of 10)[6], a noticeable minority experiences problems. For instance, a 2022 survey found that 81% of homeowners had some type of issue during their renovation, with unsatisfactory workmanship being a key concern for 18% of respondents[7]. Among those unhappy, 55.6% specifically cited workmanship quality not meeting expectations[12]. This highlights the need for homeowners to be prepared and organized in addressing any lingering problems.
This section outlines the essential practices for documenting a remodel project after its completion, emphasizing the importance of managing warranties, manuals, and photographic evidence. It explains why these steps are crucial for preserving the value and functionality of the renovation, facilitating future repairs, and ensuring that any potential issues are addressed swiftly and effectively under warranty.
4.1 The Importance of a Comprehensive Home File
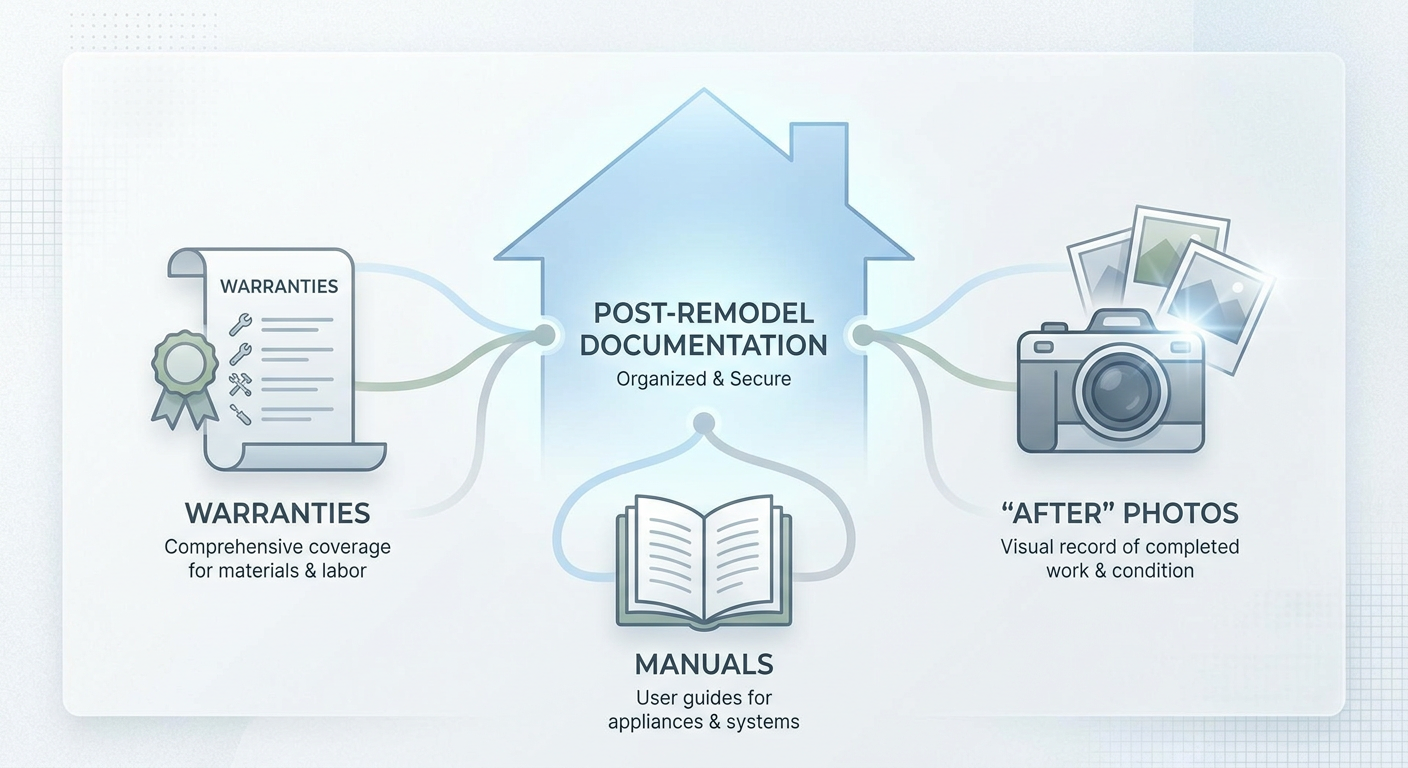
The period immediately following a remodel generates a large volume of specific information, ranging from operational instructions for new appliances to specific product details for installed materials. Consolidating this information into a central, easily accessible "home file" is a recommended practice[9]. This file serves as a lasting record of the renovation, providing data that will prove invaluable for maintenance, future upgrades, or even if the home is sold. This proactive approach helps homeowners avoid the common frustrations of searching for critical documents when a problem inevitably arises.
The critical components of this home file include:
- Contractor Invoices and Contact Information: These documents prove what work was performed and by whom. They are fundamental for any warranty claims or follow-up questions.
- Material and Finish Details: Recording the exact brand, model, color codes, and specifications of installed materials (e.g., paint, tile, grout, flooring, countertops) is highly beneficial. If a repair or touch-up is needed years later, having this data ensures a perfect match.
- Appliance Manuals and Warranty Cards: Every new appliance comes with a manual and often a separate warranty card. These should be collected, and warranties often registered with the manufacturer within a specific timeframe to be valid.
- Maintenance Guidelines: Contractors frequently provide instructions for caring for new finishes or systems. These might include recommended cleaning products for specific surfaces, guidance on re-sealing countertops, or filter replacement schedules for HVAC systems.
- Permit Sign-offs and Inspection Approvals: For projects requiring permits, retaining documentation of final inspections and approvals is important. This confirms the work met local codes and can be essential information when selling the property.
Phoenix Home Remodeling, for example, offers clients access to a remodel portal where progress photos and documents are stored. Homeowners can download final plans and specifications, ensuring these details are readily available for future reference[23][24]. This digital approach to documentation can simplify retrieval and ensure long-term accessibility.
The consequence of poor or missing documentation can be severe. Without proof of purchase or installation, obtaining warranty service may become difficult or even impossible. A missing product manual can lead to improper use, potentially voiding a warranty or causing premature failure. Moreover, if issues like water damage arise, the ability to quickly refer to project details can expedite repairs and insurance claims. The Atlanta case where a $38,000 home addition suffered an $80,000 water damage incident due to a hidden plumbing leak[4] underscores this. While proper documentation might not prevent the initial issue, it can significantly streamline the recovery process by providing clear information about the original construction and materials.
4.2 Leveraging Warranties and Guarantees
Warranties are a critical aspect of post-remodel protection. Most construction work includes a warranty, typically a 1-year guarantee on workmanship and materials[18]. Many reputable remodelers, such as Phoenix Home Remodeling, offer extended warranties, providing a 2-year labor warranty and a 1-year materials warranty[9]. This extended coverage provides homeowners with additional reassurance regarding the quality and longevity of the work. Understanding and utilizing these warranties is crucial for addressing any defects that emerge after project completion.
To effectively leverage warranties, homeowners should:
- Understand the Terms: Review the warranty clauses in the contract. Note the duration of coverage for both labor and materials, as well as the process for making a claim. Sometimes, specific maintenance practices are required to keep warranties valid.
- Register New Products: Many new appliances, fixtures, and systems require registration with their respective manufacturers to activate the warranty. This should be completed promptly within the first weeks of the remodel to ensure coverage.
- Document Issues Promptly: Any issue, no matter how minor, observed within the warranty period should be documented. This includes taking photos, noting the date, and formally communicating the problem to the contractor. This creates a traceable record of the interaction within the eligible timeframe.
For example, if a new faucet begins to leak ten months after installation, having the product information and manufacturer warranty details readily available allows for a swift resolution. The contractor or manufacturer can be contacted, and the issue can be addressed under warranty. Without this information, determining responsibility or eligibility for repair could be a protracted and costly process. The cost implications of unresolved errors are substantial; a 2023 study found that 51% of Russian homeowners unhappy with a renovation paid to correct errors, with over half spending up to ₽50,000 (approximately $500) and some spending much more[13]. Using the initial builder's warranty to address issues immediately can save homeowners thousands of dollars.
4.3 The Power of "After" Photos and Visual Documentation
Capturing "after" photos of the completed remodel is an often-overlooked yet critical step in documentation. These photos serve as visual proof of the project's condition at handover, providing a baseline for comparison if future issues arise. This visual record can be particularly useful for demonstrating whether a new crack, stain, or imperfection was present at completion or developed afterward.
Best practices for "after" photos include:
- Comprehensive Coverage: Photograph every angle of the remodeled space, ensuring all new surfaces, fixtures, and installations are visible. Take both wide shots and close-ups of critical areas like corners, seams, grout lines, and plumbing connections[9].
- Date-Stamping: Use a camera or phone setting that date-stamps photos. This provides irrefutable proof of when the images were taken, which is helpful for warranty claims.
- High Resolution: Ensure photos are of sufficient resolution to show detail. This allows for clear identification of minor defects or changes over time.
- Organized Storage: Store photos systematically, perhaps in folders labeled by room or date, and consider backing them up digitally (e.g., cloud storage, external hard drive).
Consider a scenario where a hairline crack appears in a newly painted wall three months after the remodel. If "after" photos clearly show the wall free of cracks on the completion date, it strengthens the homeowner's position that the crack developed post-completion and may be covered by the contractor's workmanship warranty. Conversely, if no such photos exist, proving the defect wasn't there initially becomes challenging.
The "after" photos also complement verbal and written communications about issues. When reporting a problem to a contractor, attaching a clear photo can help them understand the issue more quickly and dispatch the appropriate expert for resolution. This detailed visual record minimizes ambiguity and facilitates quicker responses. For example, if a homeowner notices persistent mildew spots in a newly remodeled bathroom, "after" photos can document the initial pristine condition, reinforcing the claim that the problem developed due to a ventilation design or installation flaw, leading to effective resolution under warranty[30].
4.4 Communicating and Logging Issues
Effective communication with the contractor is fundamental during the post-remodel period. Many contractors, like Phoenix Home Remodeling, schedule a final walkthrough and encourage clients to compile any concerns[28]. Their 2-year workmanship warranty further encourages homeowners to report issues openly[9]. This proactive approach saves time and money for both parties. Industry data shows that remodelers who perform post-project follow-ups receive three times more Google reviews and twice as many referrals than those who do not[11]. This suggests that good communication and follow-up are valued by clients and are beneficial for business.
A structured approach to logging issues ensures that nothing is overlooked and that all communications are recorded:
- Create an Issue Log: Maintain a simple spreadsheet or document detailing each issue. Include columns for:
- Date Noticed
- Description of Issue (including location)
- Photos (with cross-reference to file names)
- Date Reported to Contractor
- Method of Communication (e.g., email, phone call)
- Contractor's Response/Action Taken
- Resolution Date
- Formalize Communications: While a phone call to report an issue is acceptable, follow it up with an email summarizing the conversation. This creates a written record.
- Be Specific: Provide clear, factual descriptions of problems. Avoid emotional language. For instance, instead of "the floor looks terrible," write "there is a 12-inch crack in the grout between tile A and tile B near the shower, first observed on [date]."
- Adhere to Deadlines: Be aware of any specific deadlines for reporting issues, especially if the contract specifies a period (e.g., a "punch list" period).
The example of the Calgary homeowner who identified a minor sink leak within a week of kitchen remodel completion perfectly illustrates the benefits of early and documented communication. By using a paper towel to detect the slow leak and promptly notifying her contractor, the issue was fixed the next day without any water damage or cost to her[29]. This level of proactivity and responsive contractor service prevents escalation and builds trust.
Conversely, failing to communicate problems can lead to significant financial burdens. If a defect goes unreported and causes further damage, a contractor might argue that the additional damage was due to homeowner neglect. Over half of those who ended up paying for fixes to poor remodels in a 2023 study (52%) spent up to ₽50,000 (around $500), and about 17% spent ₽50,000 to ₽100,000 more[13]. This demonstrates the financial risk homeowners face when issues are not addressed promptly under warranty.
4.5 Practical Checklist for Post-Remodel Documentation
To summarize, a practical checklist for homeowners in the first 30 days after a remodel should include the following documentation activities:
| Documentation Task | Description | Importance | Key Action |
|---|---|---|---|
| Compile Home File | Gather all project contracts, invoices, permits, and contact information for the contractor and subcontractors. | Provides a central comprehensive record of the project. | Create a physical or digital folder specifically for remodel documents. |
| Collect Material & Finish Details | Obtain specific product names, brands, models, and color codes for all installed finishes (paint, tile, flooring, countertops). | Ensures smooth repairs or touch-ups with matching materials in the future. | Request a list from the contractor or manually record details from product packaging/spec sheets. |
| Organize Appliance Manuals & Warranties | Gather user manuals and warranty cards for all new appliances and fixtures. | Essential for proper operation, troubleshooting, and making warranty claims. | Register warranties online if required; store all printed materials in the home file. |
| Take "After" Photos | Capture clear, high-resolution photos of all remodeled areas, both wide shots and close-ups. | Provides visual proof of project completion condition, vital for future issue comparison. | Date-stamp photos and store them in an organized digital folder. |
| Review Warranty Terms | Read and understand the terms and duration of all contractor and manufacturer warranties. | Ensures understanding of coverage and claim procedures. | Highlight key dates and contact information in the home file. |
| Create an Issue Log | Establish a system to record any observed issues, including date, description, photos, and communication history with the contractor. | Formalizes the reporting process and creates a paper trail for all issues. | Use a digital spreadsheet or a dedicated notebook for tracking issues. |
These actions, performed diligently in the critical first month after a remodel, provide a strong framework for managing the long-term success of the renovation. They empower homeowners to address problems efficiently, ensure warranty protections are utilized, and maintain accurate records for any future needs.
4.6 Transition to Long-Term Maintenance Planning
The extensive documentation compiled during the first 30 days after a remodel forms the foundation for effective long-term home maintenance. This initial effort provides a comprehensive reference point for all aspects of the renovated space, from specific materials to warranty coverage. Moving beyond this initial period of intense vigilance, the focus shifts to integrating routine maintenance practices that build upon this established knowledge base. Understanding the types of products installed, their care requirements, and the contact points for warranty claims makes ongoing care much simpler and more effective. This careful documentation ensures that the homeowner is well-equipped to preserve the quality and functionality of their remodel for years to come.
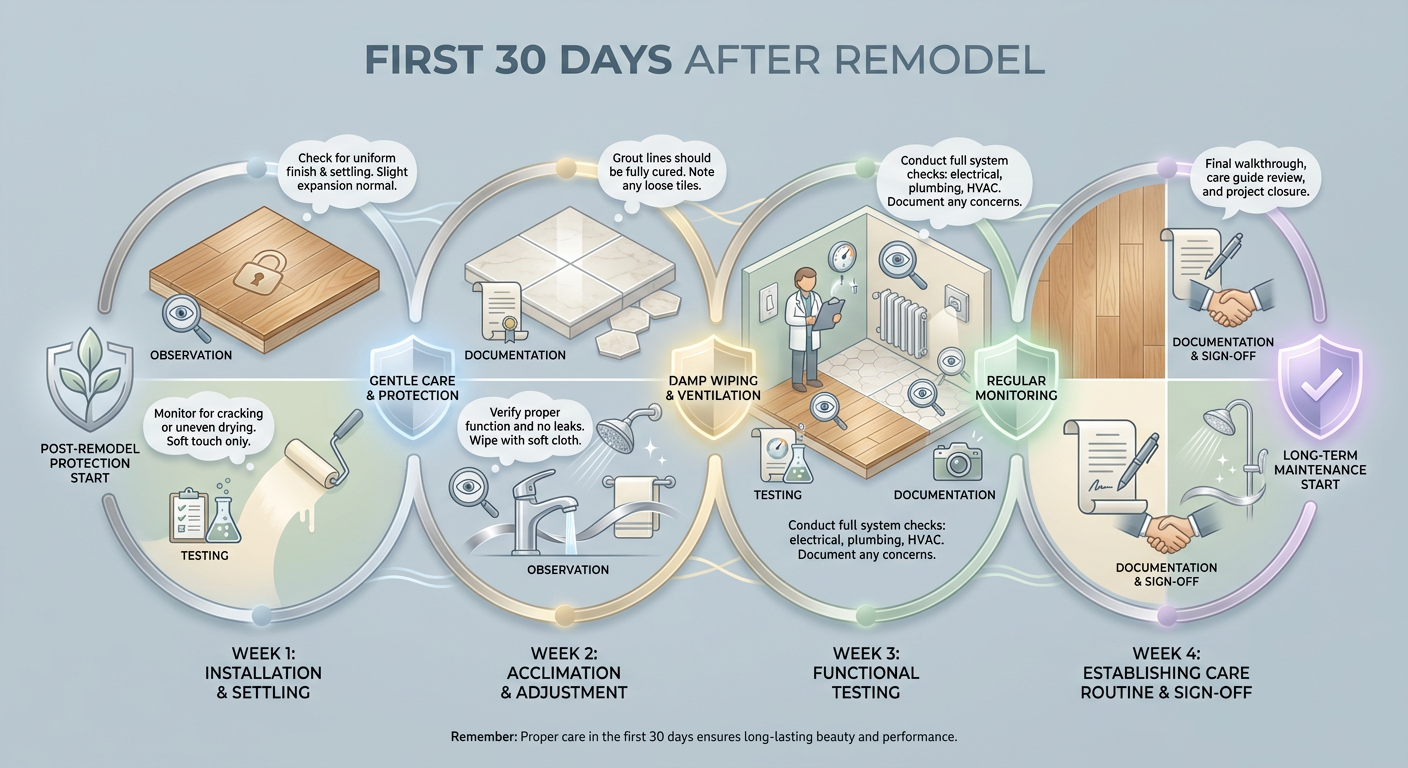
5. First 30 Days Care Guide: Maintaining New Floors, Paint, and Fixtures After Remodeling
The completion of a home remodel marks a significant milestone, transforming a living space into something new and often more functional. However, the period immediately following the end of construction, specifically the first 30 days, is crucial for preserving the quality and extending the life of newly installed materials and systems. During this initial month, floors, paint, and fixtures are still settling and curing. This means they are more vulnerable to damage from improper care or environmental changes. Gentle maintenance practices and careful environmental control are essential to protect these new materials and ensure they perform as intended for many years [1]. Ignoring this critical "break-in" period can lead to various problems, from minor cosmetic flaws to significant functional issues, often requiring costly repairs that could have been avoided.
Remodeling activity in the U.S. remains strong, with homeowners spending an estimated $603 billion on projects in 2024 [2]. This substantial investment underscores the importance of protecting these projects from common post-completion issues. Research shows that fixing mistakes and incomplete work, known as rework, accounts for about 9% of total construction spending globally, or approximately $625 billion per year [3]. Many of these issues can be prevented or caught early through diligent monitoring and proper care in the weeks following completion. While most homeowners report satisfaction with their remodels, with an average "Joy Score" of 8.2 out of 10 [4], a noticeable minority (about 19% in one survey) experience dissatisfaction, often due to poor workmanship or unmet expectations [5]. Addressing these concerns proactively in the first month through proper care and communication with the contractor is vital for ensuring long-term satisfaction.
This section details the specific considerations for maintaining new floors, paint, and fixtures, including recommendations for gentle cleaning, environmental control like humidity management, and general advice for protecting the investment during its vulnerable curing period. It also highlights the importance of documentation and communication as key components of this care guide.
Care for New Floors: Protection and Initial Maintenance
New flooring, whether hardwood, tile, carpet, or other materials, requires specific care immediately after installation. The first 30 days are particularly important as adhesives dry, finishes cure, and materials acclimate to the home's environment. Improper care during this period can lead to damage such as warping, cracking, staining, or premature wear.
Hardwood and Engineered Wood Floors
New hardwood and engineered wood floors continue to cure their finish for several weeks after installation. This curing process means the finish is still hardening and can be susceptible to damage. Homeowners should exercise caution and follow specific guidelines:
- Limit traffic: For the first 24-48 hours after installation, minimize foot traffic, especially with shoes that could scuff or scratch the new surface. Heavy furniture should not be placed on the floors during this initial period, and it is often recommended to wait at least a week before doing so, using protective pads under heavy items [1].
- Avoid rugs and coverings: Do not place area rugs or other floor coverings on new wood floors for at least 30 days. This allows the finish to breathe and cure properly. Covering it too soon can trap moisture, delay curing, and potentially cause discoloration or uneven curing.
- Gentle cleaning: For the first few weeks, cleaning should be limited to dry dusting with a soft microfiber mop or a vacuum cleaner with a hard-floor setting. Avoid wet mopping or using any liquid cleaners, as moisture can damage the still-curing finish or cause wood to swell. One study notes that large humidity swings can cause wood joints to open or flooring to cup [9]. Once fully cured, use only manufacturer-recommended cleaning products suitable for wood floors.
- Humidity control: Wood is a hygroscopic material, meaning it absorbs and releases moisture based on ambient humidity. In the first months, maintaining stable indoor humidity levels (ideally between 35% and 50%) is important to prevent excessive expansion or contraction of the wood [9]. Use humidifiers in dry climates and dehumidifiers in humid ones to keep conditions steady.
Tile and Grout
New tile installations involve thin-set mortar for adhesion and grout for filling joints. Both materials need time to cure and reach full strength. Grout lines, in particular, may initially appear perfect but can develop hairline cracks as they dry and settle [6].
- Limit moisture exposure: For new shower or bath tile, avoid using the shower for at least 24-72 hours, or as recommended by the contractor or grout manufacturer. This allows the grout to fully cure and seal. Excessive moisture too soon can weaken the grout and lead to problems like efflorescence or cracking.
- Gentle cleaning: As with wood, use mild cleaning methods initially. Avoid harsh chemicals, abrasive scrubbers, or steam cleaners on new grout for at least 30 days. Instead, use a soft cloth or sponge with plain water, or a pH-neutral cleaner. Aggressive cleaning can remove the fresh grout or sealants before they have fully hardened [7].
- Check for cracks: Inspect grout lines daily for the first two to four weeks. Small hairline cracks can appear as the grout settles. These are often easy to fix if addressed early, typically by applying a new layer of grout or sealant [6]. If left alone, these minor cracks can grow and allow water to penetrate, potentially leading to subfloor damage or mold.
- Sealant application: Many types of grout require a sealant to protect them from moisture and stains. If the contractor did not apply a sealant or if the grout is unsealed, homeowners should discuss when it is safe to apply one, usually after the curing period (e.g., 30 days).
Carpet
New carpets, particularly cut-pile styles, tend to shed loose fibers during the first few weeks, a process known as "shedding" or "fuzzing."
- Regular vacuuming: Vacuum new carpets frequently, about two to three times a week, for the first month. This removes loose fibers and helps the pile settle. Using a vacuum with adjustable height settings and a gentle brush roll can prevent damage to the new fibers.
- Avoid harsh chemicals: Do not use carpet cleaners or spot removers with harsh chemicals during the initial period. If spills occur, blot immediately with a clean, white cloth and plain water.
- Ventilation: New carpets can sometimes off-gas volatile organic compounds (VOCs). Ensure good ventilation in carpeted rooms by opening windows to improve air quality [9].
Care for New Paint: Curing and Protection
Freshly painted walls, trim, and ceilings require careful handling. While paint may feel dry to the touch within hours, it takes days or even weeks for it to fully cure and achieve its maximum hardness and durability. During this curing period, the paint film is vulnerable to marking, scratching, and damage from moisture or harsh cleaning.
- Allow full curing: Most latex paints cure in about 30 days, while oil-based paints can take longer. During this time, avoid leaning objects against the walls, bumping them with furniture, or hanging pictures. If hanging pictures is unavoidable, use soft felt pads on the back of the frames to prevent scratching.
- Gentle cleaning only: Do not wash new painted surfaces for at least 30 days [7]. Even gentle wiping can remove uncured paint or leave permanent marks. If a spot occurs, try to lightly dab it with a soft, dry cloth. After the curing period, use a soft sponge with mild soap and water, avoiding abrasive cleaners or heavy scrubbing [7].
- Humidity and ventilation: Proper ventilation helps paint cure evenly. Keep windows open or use fans to circulate air, especially in the first few days after painting. Avoid high humidity, which can slow down the curing process or even cause paint to blister or peel [9]. VOCs from new paint also benefit from ventilation to dissipate.
- Monitor for minor flaws: As paint cures and the house settles, small issues like hairline cracks around trim, caulk separation, or nail pops can appear [6]. Regularly inspect painted surfaces and document any concerns. These are often easy touch-ups if addressed within the warranty period.
Care for New Fixtures and Cabinetry
New fixtures (plumbing, lighting) and cabinetry represent a significant part of a remodel's aesthetic and function. Proper care and early testing are key to their longevity and to prevent serious issues.
Plumbing Fixtures (Faucets, Sinks, Showers)
The first 30 days are critical for identifying any issues with new plumbing connections. Water leaks are a top concern, accounting for 38% of home insurance claims and 42% of payout costs in some regions [10]. A small, undetected leak can lead to extensive and costly damage [11].
- Systematic testing: Thoroughly test all new plumbing fixtures.
- Faucets: Run hot and cold water at various pressures. Check for leaks underneath the sink in the cabinet base. Placing a dry paper towel or newspaper under the pipes can help detect even slow drips [12].
- Sinks: Fill sinks with water and drain them completely, observing drainage speed and for any gurgling sounds (which could indicate venting issues). Check for standing water or leaks around the drain assembly.
- Showers/Tubs: Run the shower for several minutes, checking water pressure and temperature. Inspect the showerhead, faucet, and drain for leaks. Fill the tub and drain it, checking for leaks underneath if accessible.
- Toilets: Flush multiple times to ensure proper functionality and that there are no leaks around the base or supply line.
- Listen and observe: Be alert for unusual sounds like dripping, running water when fixtures are off, or gurgling when water drains. Any faint musty smells could signal a hidden moisture problem.
- Ventilation in bathrooms: If a new exhaust fan was installed, use it consistently during and after showers and baths. Proper ventilation prevents moisture buildup, which can lead to mold and mildew on new grout or caulk [13]. If condensation or mildew appears quickly on new surfaces, it might indicate inadequate ventilation [13].
- Monitor water pressure: Note if water pressure seems consistently low in new fixtures compared to old ones or other parts of the house. This could indicate a partial blockage or installation issue.
- Hot water check: Ensure hot water is heating correctly and at appropriate temperatures if a new water heater or circulation system was part of the remodel.
Cabinetry and Built-ins
New cabinets, drawers, and shelving units need gentle use as they settle into their environment. Wood can slightly expand or contract with humidity changes, potentially affecting door and drawer alignment.
- Adjustments: Cabinet doors and drawers may need minor adjustments after a few weeks of use due to settling. If a door rubs or a drawer does not close smoothly, the contractor can often perform quick adjustments to hinges or slides [9].
- Gentle cleaning: For wood cabinets, use a soft, damp cloth and mild soap (if needed) for cleaning. Avoid abrasive cleaners or excess water, which can damage the finish.
- Protect surfaces: Use cabinet liners to protect the inside of new cabinets and drawers from scratches or spills.
Countertops
New countertops, especially natural stone (granite, marble, quartz), require immediate and ongoing care.
- Sealing: Natural stone countertops often require periodic sealing. Confirm with your contractor if the stone was sealed after installation and when the next application is due. Some might need an initial seal within the first few weeks.
- Avoid harsh chemicals: Always use pH-neutral cleaners on natural stone. Avoid acidic or abrasive cleaners, which can etch or scratch the surface.
- Prevent stains: Wipe up spills immediately, especially acidic liquids (like citrus juice or vinegar) or colored liquids (wine, coffee), to prevent staining on porous materials.
Environmental Control: The Foundation of Longevity
Beyond direct surface care, controlling the overall environment within the remodeled space is arguably the most important factor for protecting new materials and systems. The goal is to minimize drastic fluctuations in temperature and humidity, which can stress materials as they cure and acclimate.
Humidity Management
Stable humidity is crucial for many building materials, especially wood (flooring, cabinets, trim) and plaster/drywall. Wood expands in high humidity and shrinks in low humidity. This 'shrink-swell' cycle can lead to cracks, gaps, and warping if too severe or rapid [9]. Paint and caulk can also crack or separate due to significant material movement [6].
- Maintain a steady range: Aim for indoor relative humidity between 35% and 50% year-round [9].
- Use HVAC systems: Your home's heating, ventilation, and air conditioning (HVAC) system plays a significant role. Air conditioning reduces humidity in warmer months, while heating can dry out the air in colder months.
- Dehumidifiers and humidifiers: In extremely humid climates or during specific seasons, a dehumidifier may be necessary. Conversely, a humidifier can add moisture to very dry air.
- Proper ventilation: Use kitchen and bathroom exhaust fans to remove moisture generated from cooking and showering. This localized ventilation helps prevent excessive humidity buildup in these areas.
Temperature Stability
While less critical than humidity, extreme temperature swings can also affect materials. Avoid setting thermostats to very low or very high temperatures in newly renovated areas, especially during the curing period of paints, sealants, and adhesives. Moderate temperatures allow materials to cure at a steady rate.
- Consistent temperatures: Try to keep the interior climate within a comfortable, consistent range (e.g., 68-75°F or 20-24°C).
- Avoid direct sunlight/heat: For finishes still curing, direct, intense sunlight can sometimes cause uneven drying or discoloration. Similarly, direct high heat from space heaters too close to new surfaces should be avoided.
Air Quality and Filters
Construction generates a lot of dust, which settles everywhere. Even after a thorough cleaning by the contractor, fine dust particles will continue to circulate and settle for weeks.
- Change HVAC filters: Inspect and likely replace your HVAC filters soon after the remodel [14]. Construction dust can quickly clog them, reducing air quality and system efficiency. You may need to replace them more frequently in the first few months.
- Run air purifiers: Portable air purifiers with HEPA filters can help capture lingering dust and airborne particulates, improving indoor air quality.
- Professional cleaning: Some homeowners opt for a professional post-construction cleaning service a few weeks after the remodel, especially if persistent dust is a concern.
Documentation and Communication: Reinforcing Care
Effective care of a newly remodeled space goes hand-in-hand with thorough documentation and clear communication with your contractor. These practices ensure that any issues are recorded, reported, and addressed under warranty, protecting your investment.
Creating a Homeowner Turnover File
At the project's conclusion, gather all relevant information into a dedicated file, physical or digital [15]. This makes it easier to access critical details when questions or issues arise.
- Contractor details: Keep the contractor's contact details, including project manager and any subcontractors. Record project timelines and completion dates.
- Material specifications: Document every material used, including brand names, product numbers, color codes, and finishes. This includes paint colors, tile names, grout colors, flooring types, and appliance models [16]. This information is invaluable for future touch-ups or repairs.
- Product manuals and warranties: Store all appliance manuals, fixture instructions, and product warranty cards. Register these products with manufacturers where appropriate, as this often activates the full warranty coverage.
- Maintenance guidelines: Contractors or manufacturers often provide specific care instructions for new items (e.g., how to clean a specific countertop, when to re-seal a shower). Keep these accessible.
- "Before and After" photos: Take detailed photos of the completed work. These serve as a visual record of the work's condition immediately after completion [17]. If issues develop, these photos can help demonstrate changes over time.
- Permits and approvals: Save copies of all permits and inspection sign-offs, as these are important legal documents for the home.
Prompt Communication with Your Contractor
The first 30 days are the ideal time to report any observed issues, no matter how small. Contractors often anticipate a punch list or follow-up visit after project completion [9].
- Report issues immediately: Do not wait to report problems. Small issues like hairline cracks in caulk or grout, or a minor leak, can prevent them from becoming larger and more expensive problems [18].
- Document every issue: For each problem, note the date you observed it, provide a clear description, and take photos. If you email or text your contractor, keep copies of that communication. This creates a clear paper trail.
- Utilize warranties: Most general remodel work comes with at least a one-year warranty on workmanship and materials [19]. Some reputable contractors, like Phoenix Home Remodeling, offer extended warranties, such as a 2-year labor warranty [20]. Understanding and leveraging these warranties is key. Timely reporting ensures issues are addressed within the warranty period and typically at no extra cost.
- Be proactive: If your contractor does not initiate a post-completion follow-up, it is acceptable to request one, perhaps around the 30-day mark. This allows for a joint inspection of the work and a chance to discuss any concerns or maintenance questions. Studies show that contractors who conduct post-project follow-ups receive significant benefits, including 3 times more Google reviews and 2 times more referrals [21], indicating a positive client response to this practice.
Conclusion
The first 30 days after a home remodel represent a critical phase that requires active participation from the homeowner. By embracing gentle maintenance practices, carefully managing the internal environment through humidity and temperature control, and diligently documenting and communicating any concerns, homeowners can protect their substantial investment. This proactive approach ensures the new floors, paint, and fixtures cure correctly, settle properly, and maintain their intended appearance and function for the long term. Timely action in this period also preserves the aesthetic and structural integrity of the remodel but also allows for effective use of contractor warranties, preventing minor issues from escalating into expensive repairs. This sustained care, coupled with responsive contractor support, is fundamental to a truly successful and satisfying remodeling experience.
6. Stay in Touch: Reporting Issues and Using Your Remodel Warranty in the First 30 Days
The completion of a home remodel marks a significant achievement for homeowners. The new space often looks perfect, reflecting the vision and hard work invested. However, the period immediately following construction, specifically the first 30 days, is a critical time for oversight and communication. It is during this initial phase that minor imperfections can surface, new systems can reveal subtle flaws, and the settling of materials can cause unexpected issues. Homeowners must remain engaged with their contractors to address these matters promptly. This proactive approach ensures that problems are resolved efficiently under warranty, preventing them from escalating into costly repairs and preserving the long-term quality and value of the renovation. Communication and proper documentation are not merely afterthoughts; they are essential components of a successful remodel, securing the investment and ensuring client satisfaction.
Remodeling activity throughout the U.S. demonstrates the scale of these projects. Homeowners spent approximately $603 billion on home remodeling projects in 2024[6]. Such a large financial commitment underscores the need for diligence during the post-remodel period. While most homeowners report satisfaction with their renovations (an average "Joy Score" of 8.2 out of 10)[6], a significant number of remodel projects still encounter problems. A 2022 survey found that 81% of homeowners experienced some type of problem during their renovation[7]. These issues often relate to workmanship quality, and they frequently become apparent within the first month of occupying the renovated space. Repairing mistakes and incomplete work accounts for about 9% of total construction spending globally, which is an estimated $625 billion lost annually on rework and defect repairs[5]. Catching and fixing concerns early can reduce these costs for both parties.
This section explores the importance of diligent observation, thorough testing, and systematic documentation during the first 30 days after a remodel. It highlights how prompt communication with the contractor and strategic use of warranties can keep a remodeling project successful and protect the homeowner's investment. By understanding what to watch for and how to respond, homeowners can ensure their newly renovated spaces meet their expectations for years to come.
Reporting Issues: Why Timely Communication Matters
Effective communication between homeowners and their contractors should not end when construction crews leave. The first 30 days following a remodel are crucial for identifying and reporting any problems that arise. Contractors generally expect some minor issues to surface as new materials settle and systems are used. Promptly reporting these issues allows them to be addressed while they are small and typically covered under warranty, avoiding more extensive and expensive repairs down the line.
Many subtle issues, such as hairline cracks in caulk or grout, or minor leaks, often appear as materials adjust to their new environment[1][2]. For example, caulk around a new bathtub might show a small separation, or a painted wall could develop a minor bulge where a nail or screw has moved slightly[2]. These are often cosmetic and easy to fix if caught early. Ignoring them, however, can lead to larger problems. A hairline crack in an improperly sealed shower, for instance, could eventually allow water to seep into wall cavities, creating mold or structural damage. By documenting and communicating these slight changes, homeowners ensure that the contractor can perform necessary touch-ups or repairs, often at no additional cost under the workmanship warranty.
Water leaks are a particularly high concern. Statistically, about 38% of home insurance claims are related to water damage[10], and these claims account for over 42% of total payout costs[10]. A hidden plumbing leak can cause significant damage if undetected. One case involved an Atlanta homeowner whose new addition suffered $80,000 in damage due to an improperly fitted hot water line that leaked slowly over weeks, soaking floors and ceilings[4]. This example shows that even a small, unnoticed drip from a new fixture can result in catastrophic outcomes. Regular checks and immediate reporting of any signs of moisture, such as drips under sinks or unexpected water stains, are therefore essential during the initial weeks after a remodel. Such vigilance allows contractors to fix issues like loose compression fittings, as seen in a Calgary example where a homeowner detected a minor sink leak with a paper towel and had it fixed the next day, preventing any damage[3].
Electrical issues are another common problem area. Surveys indicate that among homeowners who faced remodeling problems, 21% had electrical glitches[8]. These can range from minor annoyances like tripped breakers to potential safety hazards like incorrect wiring. Testing every electrical outlet and light switch, as well as running new appliances, helps uncover these issues early. If a new outlet trips a breaker, or an appliance fails to function as expected, addressing it quickly allows the contractor’s electrician to diagnose and rectify the problem under warranty before it poses a greater risk.
Contractors generally welcome timely reports of issues. Reputable remodelers typically include a warranty on their work, and addressing minor problems helps them uphold their reputation and maintain customer satisfaction. For example, Phoenix Home Remodeling offers a 2-year labor warranty, exceeding the industry standard of one year[9]. This extended warranty demonstrates confidence in their work and encourages clients to report any issues that arise. Contractors often find it more cost-effective and beneficial for their reputation to fix small problems proactively than to deal with frustrated clients or larger, more expensive repairs months later. Furthermore, companies that perform post-project follow-ups see improved client engagement, generating three times more Google reviews and twice as many referrals than those who do not[11], highlighting the business value of good post-completion support.
In summary, timely communication is not just good practice but a necessary step for homeowners to protect their investment and for contractors to maintain their standards of quality and service. By reporting issues as they are noticed, homeowners leverage their warranty coverage and contribute to the successful completion of the entire project.
Using Your Remodel Warranty: A Homeowner's Guide
A remodel warranty is a critical protection for homeowners, ensuring that any defects in workmanship or materials are addressed by the contractor after the project is complete. Understanding and effectively using this warranty in the first 30 days is paramount. The average cost of fixing mistakes and incomplete work in construction is approximately 9% of the total project budget[5]. Early detection and warranty claims can prevent homeowners from bearing these costs.
Understanding Warranty Coverage
Most contractor contracts include a warranty, typically covering workmanship and materials for at least one year[7]. Some contractors, like Phoenix Home Remodeling, offer longer labor warranties, such as two years, while maintaining a one-year material warranty[9]. It is essential for homeowners to be fully aware of the specific terms of their warranty:
- Duration: Note the start and end dates of all warranty periods. Keep track of separate warranties for different components (e.g., appliances, roofing, windows, fixtures), as these may vary by manufacturer.
- Coverage Details: Understand what the warranty covers (e.g., structural defects, material failure, installation errors) and what it excludes (e.g., normal wear and tear, damage caused by homeowner misuse, acts of nature).
- Claim Process: Know the steps required to file a warranty claim, including who to contact, what documentation is needed, and the typical response time.
The Importance of Early Activation and Documentation
The first 30 days after a remodel are an opportune time to activate warranties that require registration and to carefully document any issues. Many manufacturers of new appliances and fixtures specify that products must be registered within a certain period to validate the warranty. Failing to register can void coverage, leaving the homeowner responsible for repair or replacement costs if a product fails.
Detailed documentation is the cornerstone of a successful warranty claim. Homeowners should create a “home file” containing:
- Contract and Invoices: All contracts, change orders, and payment records.
- Warranty Certificates: Any specific warranty documents provided by the contractor or manufacturers.
- Product Manuals: Instructions and care guides for all new appliances and fixtures.
- Project Specifications: Details on paint colors, material brands, model numbers, and finishes used.
- Photographic Evidence: “Before” and “after” photos of the remodeled area, as well as clear photos of any observed defects. Date and timestamp these images.
- Communication Log: A record of all discussions, emails, and messages with the contractor regarding specific issues, including dates and actions taken.
When an issue is identified, documenting it immediately with photos and a written description is crucial. This provides concrete evidence of the problem's existence and condition at a specific time. For example, if a hairline crack appears in kitchen countertop caulk, taking a photo and noting the date establishes a baseline for future comparison if the crack worsens. This also proves that the issue was identified within the warranty period, which is essential for compelling the contractor to address it.
Homeowners often hesitate to report minor issues, fearing they might be perceived as overly critical. However, reputable contractors prefer to address small problems quickly. These early fixes are typically less new and less costly than extensive repairs required if issues are left untended. A contractor's willingness to perform these "punch-list" items demonstrates their commitment to quality and customer satisfaction, which helps build trust and generates positive referrals. Contractors who proactively follow up post-project are often seen as more reliable and receive better client feedback, translating into increased business opportunities[11].
In cases where problems are not immediately apparent or are a result of material settling, homeowners might find issues like drywall nail pops appearing as wood framing dries out[2]. Such minor flaws are common and generally easy to rectify. The key is monitoring the new space during the initial weeks and gathering all identified concerns into a comprehensive list for the contractor. This systematic approach ensures no issue is overlooked and that the contractor is presented with a clear action plan.
The warranty period is not merely a formality; it is an active phase of the renovation process. By being organized, communicative, and diligent, homeowners can effectively use their remodel warranty to safeguard their investment and ensure their refurbished home maintains its quality and aesthetic appeal.
Proactive Inspections and Testing
The first month after a remodel is the ideal time to rigorously test all new components and systems. Many defects only become apparent through active use. This proactive testing can prevent significant damage and ensure that everything operates as intended. Homeowners should adopt a systematic approach to inspections and testing, focusing on areas most prone to issues.
System Testing: Plumbing and Electrical
Plumbing and electrical systems are among the most common sources of post-renovation problems, with surveys indicating that 32% of homeowners experienced plumbing issues and 21% had electrical problems directly after a renovation[8]. Therefore, thorough testing of these systems is non-negotiable:
-
Plumbing:
- Faucets and Showerheads: Run all new faucets and showerheads at full pressure. Check for any leaks around the base, handles, or in the pipes beneath sinks[1]. Pay attention to water pressure; weak pressure could indicate a problem with the new fixtures or installation.
- Drains: Fill sinks, tubs, and showers, then observe how quickly they drain. Listen for unusual gurgling sounds, which might signal venting issues.
- Toilets: Flush new toilets multiple times. Check for continuous running water or any leaks at the base.
- Appliances: Run new dishwashers, washing machines, and ice makers through full cycles. Check supply and drain lines for leaks.
- Hidden Leaks: Place dry paper towels or cardboard under all accessible pipes (e.g., under sinks, behind toilets) for several days. Even a slow drip will be visible on the paper[3]. Checking daily for the first week can catch problems before they become severe.
-
Electrical:
- Outlets: Test every new electrical outlet using a simple plug-in tester (available at hardware stores) to confirm it is receiving power and wired correctly.
- Switches and Lights: Operate all new light switches, including dimmer controls, to ensure they function properly.
- GFCIs/AFCIs: Test all Ground Fault Circuit Interrupter (GFCI) and Arc Fault Circuit Interrupter (AFCI) outlets or breakers by pressing their test buttons to ensure they trip and reset.
- Appliances: Run new electrical appliances (e.g., range, microwave, garbage disposal) to confirm they operate correctly and do not trip breakers.
During these tests, homeowners should also pay attention to any unusual smells (like burning plastic from electrical issues or sewage from a dry P-trap) or sounds (like water dripping or electrical buzzing). Such signs can indicate underlying problems that need immediate professional attention.
Finish and Functionality Checks
Beyond systems, a detailed inspection of all new finishes and functional elements is vital. While cosmetic, timely correction of these issues contributes significantly to overall satisfaction:
- Surfaces: Inspect walls, ceilings, trim, and built-ins for uneven paint, brush marks, or small cracks and nail pops as materials dry and settle[2]. Evaluate the evenness of tile grout lines and whether caulk is uniformly applied and fully sealed[1].
- Doors and Windows: Test all new or adjusted doors and windows. Ensure they open and close smoothly, latch securely, and do not stick or rub against frames. Check that weatherstripping is fully sealed.
- Cabinetry and Drawers: Open and close all cabinet doors and drawers repeatedly. Check for proper alignment, smooth operation of slides, and secure hardware. Look for any rubbing or sticking.
- Flooring: Walk across new flooring to check for levelness, squeaks, or loose planks/tiles. Observe if any gaps appear between seams.
The severity of some issues can be quite notable. For example, a homeowner in Atlanta discovered warping hardwood floors weeks after a new addition because of an unnoticed leak from an improperly installed hot water line. The damage ultimately cost $80,000 to repair, stressing the need for vigilance far beyond visual checks[4]. In another instance, persistent mildew in a newly remodeled bathroom was traced to an undersized exhaust fan, which was only caught because the homeowners paid attention to performance issues during their first month of use[3].
Proactive inspections and comprehensive testing during the first 30 days serve as a homeowner's personal quality assurance measure. By thoroughly evaluating every aspect of the remodel, from hidden plumbing connections to cosmetic finishes, homeowners can quickly identify problems and utilize their contractor's warranty and follow-up support to ensure all concerns are resolved.
Establishing a Follow-Up Schedule and Documenting Communication
Maintaining clear and consistent communication with the contractor is essential in the post-remodel phase. Even after the final walkthrough, issues may surface. Establishing a structured follow-up schedule and carefully documenting all interactions can streamline the resolution process and protect both parties.
Scheduling a Post-Completion Check-in
Many diligent contractors offer or welcome a formal check-in within the first month after project completion. This can be a phone call, email, or a physical walkthrough. If the contractor does not propose one, homeowners should not hesitate to request a 30-day post-completion inspection. During this appointment, the homeowner can present a compiled list of observations from their diligent testing and inspections. Phoenix Home Remodeling, for example, typically conducts a 30-day post-project walkthrough, where they address any minor issues, answer questions, and perform touch-ups, reinforcing customer satisfaction and trust.
For example, in a Phoenix, AZ case, Phoenix Home Remodeling scheduled a 30-day follow-up after a full interior remodel. The project manager addressed minor issues like a rubbing cabinet door, a cracked grout line in the shower, and explained how to use a new programmable thermostat. This proactive approach resolved all concerns onsite and led to a highly positive review and referrals from the happy homeowners[14]. This demonstrates how a scheduled follow-up can solidify the project's quality and customer relationships.
Documentation of Communication
Every interaction regarding post-remodel issues should be documented. This creates a clear paper trail that can be invaluable if disputes arise or if subsequent warranty claims are needed. Key elements of documentation include:
- Date and Time: Record when each communication occurred.
- Method of Communication: Note whether it was a phone call, email, text message, or in-person discussion.
- Parties Involved: Identify who was contacted (e.g., project manager, specific trade specialist) and who initiated the contact.
- Issue Details: Briefly describe the issue discussed, referencing any supporting photos or videos.
- Agreed Actions: Document what was decided, who is responsible for the next step, and any deadlines.
For written communication, email is often preferred as it provides an automatic record. For phone calls or in-person conversations, a brief follow-up email summarizing the discussion and agreed-upon actions can serve as a valuable record. This documentation also protects the homeowner but also provides the contractor with clear, timestamped information for their records, which can assist in scheduling and resource allocation for warranty repairs.
This systematic approach to communication and documentation helps bridge the gap between project completion and long-term satisfaction. By actively engaging with the contractor and keeping careful records, homeowners ensure that their remodel remains a positive and lasting investment, free from unresolved issues.
Care and Maintenance for New Finishes
Beyond identifying and reporting issues, the first 30 days after a remodel are also crucial for the proper care and maintenance of new finishes and materials. Many products, such as paint, grout, and caulk, require time to fully cure and harden. Treating these new surfaces with gentleness and controlling the home environment can significantly extend their lifespan and appearance[2].
Gentle Cleaning Practices
New finishes may be more vulnerable to damage from harsh chemicals or abrasive cleaning methods. It is generally advised to clean gently and sparingly during the initial curing period[1]. Specific recommendations include:
- Avoid Harsh Chemicals: Do not use strong detergents, abrasive cleaners, or scrub pads on newly painted surfaces, sealed countertops, or grouted tiles. These can strip protective layers, dull finishes, or even cause etching[1].
- Mild Soap and Water: For most surfaces, a soft cloth with warm water and a small amount of mild, pH-neutral soap is sufficient for initial cleaning.
- Manufacturer Guidelines: Always consult product-specific instruction manuals and care guides. Many products have explicit curing times and recommended cleaning agents.
- New Carpets: New carpets often shed fibers for the first month. Regular, gentle vacuuming during this period helps remove loose fibers and prevents matting, while also improving indoor air quality.
Over-cleaning or aggressive cleaning could inadvertently damage surfaces that have not fully hardened, potentially voiding material warranties. For instance, attempting to scrub out a stain on newly sealed grout too soon might remove the sealant, making the grout more susceptible to future staining or cracking.
Environmental Control
Maintaining stable environmental conditions in the remodeled space is another vital aspect of early post-remodel care. Temperature and humidity fluctuations can affect how materials cure and settle, leading to cosmetic issues or even structural stress[2].
- Humidity: Wood products (flooring, cabinetry, trim) are particularly sensitive to humidity changes. Large swings from very dry to very humid conditions can cause wood to expand, contract, warp, or crack, and can also lead to separation in caulk and grout lines. Maintaining a stable indoor humidity level, typically between 35% and 50%, is recommended[2]. Using exhaust fans in kitchens and bathrooms, or a humidifier/dehumidifier as needed, can help regulate moisture.
- Temperature: Avoid extreme temperature fluctuations. While new materials are curing, keep the space at a comfortable, consistent temperature. Direct exposure to extreme heat (e.g., strong sunlight through a window without blinds) or cold can negatively affect paint, caulk, and sealants.
- Ventilation: New paint, sealants, and some building materials can off-gas volatile organic compounds (VOCs). Ensuring good ventilation by occasionally opening windows or using exhaust fans during the first few days and weeks improves indoor air quality and helps materials cure properly.
- HVAC Filters: Construction inevitably generates significant dust. Checking and replacing HVAC filters immediately after the remodel, and then regularly in the first few months, helps maintain air quality and prevents dust from recirculating throughout the home[2]. Some contractors even recommend temporary, less restrictive filters during construction for dust capture, to be swapped out for high-efficiency filters post-completion.
An example of environmental control impact was seen in Hartford, CT, where persistent mildew in a newly updated bathroom was attributed to insufficient ventilation from an undersized exhaust fan. The constant high humidity created by the lack of proper air exchange prevented the caulk from drying completely, leading to recurring mold. The issue was resolved by upgrading the ventilation system, which stopped the mildew growth[3].
By treating the new space with care and controlling its environment, homeowners can support the proper settling and curing of materials, minimize the appearance of minor defects, and ensure the longevity of their remodel. This initial period of gentle maintenance sets the foundation for a durable and visually appealing outcome.
The first 30 days after a remodel are far from an ending; they are a vital transition phase that directly influences the long-term success of the project. Proactive engagement from homeowners, coupled with responsive support from contractors, is key to addressing any emerging issues, leveraging warranties effectively, and ensuring satisfaction. The cases discussed, from the costly plumbing leak in Atlanta to the quick fix in Calgary, and the exemplary follow-up by Phoenix Home Remodeling, consistently highlight the value of vigilance during this period.
By carefully watching for defects, thoroughly testing new systems, documenting all information, and applying gentle maintenance, homeowners can protect their significant investment. For contractors, prioritizing post-completion communication and follow-up also fulfills contractual obligations but also fosters client trust and generates positive referrals, proving that a successful remodel truly goes beyond the last day of construction.
The next section will explore into the financial aspects homeowners should consider once the remodel is complete, ensuring they manage costs and value effectively.
References
- Anderson Remodeling. (2025, June 24). Post-Remodel Punch List: What to Watch for in the First 30 Days.
- Elevation Renovations. (2023, August 21). Post Renovation Maintenance Checklist: Keep Your Reno Looking New.
- Service Atlas Blog. (2026, March). Your First 30 Days: Reset the House and Learn Its Habits.
- Homes & Gardens / Yahoo News. (2025, September 3). ‘I felt completely sick’ - $80,000 Water Damage Wreaked Havoc on New Addition.
- Tasktag Blog. (2026, April 21). Construction Punch List Template: Closeout Checklist for Contractors (2026).
- Qualified Remodeler. (2025, April 9). Remodeling Impact Report 2025: Cost Recovery & Owner Satisfaction.
- RBC Realty. (2023, October 27). Survey: Common Renovation Problems and Regrets (Russia 2023).
- Lenta News. (2023, October 26). Home Renovation Difficulties Poll (DIY vs Contractors).
- Phoenix Home Remodeling. (n.d.). FAQ and Warranty Policy. Accessed October 2024.
- College of Insurers, Madrid. (2025, February). Insurance Claims Data - Water Damage Frequency (2024).
- Austin Web Services. (2026, February 19). Retention Marketing for Remodelers: Post-Project Follow-Up.
- Mynavi News / Unitus research. (2022, August 1). Japanese Homeowners Survey on Remodeling Satisfaction (2022).
- RBC/SberServices Study. (2023, October). “Redo or Live With It” - Fixing Bad Renovations Stats (2023).
- Phoenix Home Remodeling. Client Portal Communication. Accessed October 2024.
7. Common Post-Remodel Problems and Their Costs
The period immediately following a home remodel is crucial. While a project might appear finished, many newly installed materials and systems continue to settle and adjust during the first 30 days. This settling process often reveals minor flaws or performance issues that were not visible at the time of completion [1] [2]. Missing these early signs can turn small, rectifiable problems into substantial financial burdens and discomfort for homeowners. The financial implications of unaddressed post-remodel issues are significant. Globally, construction defects and rework account for approximately 9% of total project costs, an estimated $625 billion annually [5]. For individual homeowners, failing to identify and address issues promptly can lead to unexpected costs and months of additional repairs [4]. This section details common problem areas that emerge after a remodel, their potential costs, and why early detection and documentation are essential for keeping a renovation on track and protecting the homeowner's investment.
Remodeling activity represents a substantial investment. In 2024, American homeowners spent approximately $603 billion on home renovations [6]. With such large sums involved, ensuring the quality and longevity of remodels is paramount. While most homeowners report satisfaction with their completed projects (an average "Joy Score" of 8.2 out of 10) [10], a notable minority encounters problems. A 2022 survey found that 81% of homeowners experienced some type of problem during their renovation [7]. While many of these issues are resolved during the project, those that surface post-completion, especially within the first month, require specific attention. The most frequently cited post-remodel issues include problems with plumbing (32%), electrical glitches (21%), and uneven finishes like wallpaper (24%) [8].
Diligent observation, thorough testing, and careful documentation during the first 30 days are not merely best practices; they are critical safeguards. Catching a hairline crack in caulk [1] or a minor drip under a sink [4] early can prevent water damage totaling tens of thousands of dollars later [4]. This immediate post-completion phase benefits both homeowners and contractors. Homeowners can ensure issues are fixed under warranty, while contractors can uphold their quality standards, maintain client satisfaction, and reduce the likelihood of costly future claims. Some contractors, such as Phoenix Home Remodeling, offer extended labor warranties (two years instead of the standard one) and proactive follow-ups, recognizing the value of addressing post-remodel concerns promptly [9] [11].
General Categories of Post-Remodel Problems
Post-remodel problems can be broadly categorized into several areas. Understanding these categories helps homeowners focus their inspection efforts during the critical first 30 days.
- System Malfunctions: This includes issues with plumbing, electrical, and HVAC systems. These are often the most urgent and costly problems if left unaddressed.
- Finish Imperfections: Visible flaws in surfaces like paint, tile, grout, and caulk. While often cosmetic, some can indicate underlying structural movement or moisture issues.
- Appliance and Fixture Performance: New appliances and fixtures may not function as expected due to installation errors or manufacturing defects.
- Environmental Adaptation: How new materials react to the home's environment, particularly temperature and humidity fluctuations.
- Design and Expectation Gaps: Cases where the final outcome does not align with the homeowner's vision or initial plans, despite the work being technically correct.
Prompt identification within the warranty period (typically one year, but sometimes two years for labor [7]) allows issues to be resolved at the contractor's expense. Delays can result in homeowners having to pay for repairs themselves, which is a common occurrence [13].
The importance of addressing issues early cannot be overstated. Roughly 51% of homeowners unhappy with a renovation ended up paying to correct errors, with over half spending up to ₽50,000 (approximately $500) and 17% spending more [13]. This extra spending highlights the benefit of leveraging warranties and professional follow-ups.
Plumbing System Failures and Their Costs
Plumbing issues are consistently ranked as a top post-remodel problem. Among homeowners who reported difficulties, 32% cited problems with plumbing or pipes [8]. This is a critical area because water damage can escalate quickly and cause significant destruction to a home, leading to high repair costs. Water damage incidents account for a large percentage of home insurance claims, reaching 38.2% in some regions and representing 42.4% of total claim payouts [10].
Common plumbing problems that appear after a remodel include:
- Leaks: These can range from minor drips under sinks or around new fixtures to more substantial leaks within walls or floors. A loose fitting or improperly sealed pipe can cause damage over time. One homeowner experienced an $80,000 damage claim due to a hidden hot water line leak caused by an improperly drilled hole and pipe stress, eventually rupturing [4]. The water seeped for days before being noticed, leading to extensive damage to floors, walls, and ceilings [4].
- Low Water Pressure or Poor Drainage: New pipes, fixtures, or system modifications can impact water flow. These issues can indicate blockages, incorrectly sized pipes, or venting problems.
- Fixture Malfunctions: New faucets, showerheads, or toilets may not operate correctly due to faulty installation or manufacturing defects.
The cost implications of plumbing failures are severe. A small, undetected leak can lead to mold growth, rot in structural components (like floor joists and subfloors), and damage to finishes like drywall, paint, and flooring. Remediation involves also fixing the leak but also drying affected areas, removing damaged materials, and replacing them. As seen in the Atlanta example [4], a seemingly minor installation error can result in costs far exceeding the original project's budget. The early detection of a small leak in a Calgary kitchen, identified by placing a paper towel under the U-bend of a new sink, prevented extensive damage and resulted in a quick, free fix by the contractor [18]. This example highlights how simple, proactive testing can save thousands of dollars and considerable stress. Homeowners should conduct systematic checks, including running all new fixtures, checking for drips, and monitoring water pressure [3].
To mitigate these risks, homeowners should:
- Flush all drains repeatedly after a remodel, and inspect under sinks and around fixtures for any signs of moisture [3].
- Use a piece of paper towel under new pipes to detect slow, hidden drips [18].
- Run all water-using appliances (dishwasher, washing machine) through full cycles to check for proper drainage and leaks.
- Note any unusual smells (like sewer gas) or sounds (gurgling) coming from drains.
Electrical System Glitches and Potential Hazards
Electrical issues represent another frequent problem area, with 21% of homeowners reporting such glitches post-remodel [8]. While perhaps less immediately apparent than a water leak, electrical faults can pose fire hazards, damage appliances, or simply cause significant inconvenience. Often, these issues manifest when the electrical system is under normal load, which may not happen until the homeowner resumes daily life in the space.
Common electrical problems include:
- Non-functional Outlets or Switches: This can be due to incorrect wiring, loose connections, or tripped circuit breakers.
- Frequent Breaker Trips: If a new circuit or outlet repeatedly causes a breaker to trip, it suggests an overload or a fault in the wiring.
- Flickering Lights: Can indicate loose connections, faulty wiring, or a poor power supply.
- Overheated Outlets or Switches: A dangerous sign of loose wiring or excessive current draw, which can lead to fire.
- GFCI/AFCI Issues: Ground Fault Circuit Interrupter (GFCI) and Arc Fault Circuit Interrupter (AFCI) outlets or breakers in new installations may trip too frequently or not at all, indicating a fault.
The costs associated with electrical problems can range from simple troubleshooting fees to extensive repairs involving opening walls to access faulty wiring. The greater concern is safety; a serious electrical fault can lead to fire, property damage, and personal injury. Early testing is key to identifying these issues before they become dangerous or destructive.
Homeowners should perform the following checks:
- Test every new or modified electrical outlet using a small appliance or an outlet tester [3].
- Flip every new light switch and ensure all lights function as expected.
- Plug in various appliances to new circuits to verify they can handle the load without tripping breakers.
- Check that GFCIs and AFCIs function correctly by using their test buttons.
Finish Imperfections and Aesthetic Issues
While less hazardous than plumbing or electrical problems, issues with finishes can significantly impact homeowner satisfaction and the aesthetic appeal of a remodel. These problems occur frequently because materials like paint, caulk, and grout continue to cure and settle for weeks after installation [2] [7].
Common finish issues include:
- Caulk and Grout Cracks: Hairline cracks can appear as materials dry and the house settles [1]. This is often cosmetic, but in wet areas like showers, unsealed cracks can allow water intrusion.
- Paint Irregularities: Nail pops (small bulges where drywall screws shift), uneven texture, or blistering can appear as paint cures or drywall dries [7] [8].
- Tile or Flooring Problems: Loose tiles, uneven grout lines, or gaps in new flooring can become visible as the floor settles.
- Cabinetry and Trim Issues: Doors or drawers that stick, misaligned trim pieces, or gaps where trim meets walls can appear with humidity changes or settling.
While many of these are minor and easy to fix with touch-ups, ignoring them can lead to larger problems or ongoing dissatisfaction. The cost of addressing these issues increases if rectification requires a specialist or if the warranty period expires. For example, a minor caulk crack in a shower might be a quick fix for the contractor during a follow-up visit. If left for months, it could lead to water seepage behind the wall, necessitating significant tile and drywall repair.
Homeowners should perform detailed visual inspections:
- Regularly inspect all painted surfaces, especially around windows, doors, and corners, for cracks or unevenness.
- Examine grout lines and caulk seals in bathrooms and kitchens.
- Check the alignment and operation of all new cabinetry, doors, and drawers.
- Walk across new flooring to check for creaks, loose boards, or unevenness.
Environmental Factors and Material Adaptation
New materials respond to the internal environment of a home. Fluctuations in temperature and humidity, especially during the first few weeks, can cause materials to expand, contract, or shift [2].
Key areas to watch:
- Wood Movement: New hardwood floors, cabinets, or trim can expand or contract with significant humidity changes, leading to gaps, warping, or sticking components. Maintaining stable indoor humidity (around 40-50%) is important [9].
- Off-gassing: New paint, flooring, and cabinetry adhesives can release volatile organic compounds (VOCs). Adequate ventilation during the initial weeks is important for indoor air quality.
- Dust Accumulation: Construction dust can linger for weeks, affecting air quality and coating surfaces. Changing HVAC filters immediately after a remodel and running air purifiers can help [9].
- Moisture and Mildew: In areas like new bathrooms, insufficient ventilation can lead to persistent condensation and rapid mildew growth on new caulk or paint. Persistent black spots on new bathroom caulk, despite cleaning, can indicate a ventilation issue, as one Hartford homeowner discovered [19].
Addressing these environmental factors early can prevent problems like warping floors or chronic mold growth. This proactive maintenance falls largely to the homeowner but should be guided by contractor advice and documented information.
Documentation and Warranty Leverage
Thorough documentation is a homeowner's primary tool for addressing post-remodel problems. This includes keeping a "home file" with invoices, product manuals, warranty cards, paint codes, and photos of the finished work [2] [3]. Phoenix Home Remodeling, for instance, provides a remodel portal for clients to access important documents and project photos [8].
Key elements of documentation:
- Contractor Information: Keep contract, invoices, and direct contact details.
- Product Specifications: Records of all finishes, materials, fixture models, and appliance serial numbers.
- Warranties: Keep all warranty documents, and register appliances/fixtures that require it [7]. Most general workmanship warranties last one year, though some, like Phoenix Home Remodeling's, extend for longer [9].
- Photos and Videos: Documenting before-and-after states, and especially any noticed defects with dates.
- Communication Log: Records of all communications with the contractor regarding issues, including dates and resolutions.
This documentation empowers homeowners to make warranty claims, ensures correct repairs, and provides reference for future maintenance. Without proper documentation, it can be difficult to prove that an issue falls under warranty or to ensure the correct replacement parts are used.
The Cost of Unaddressed Issues
The failure to watch, test, and document issues in the first 30 days can result in several types of costs:
- Direct Repair Costs: Once outside the warranty period, homeowners pay out of pocket for repairs. As noted, over half of homeowners who redid work spent up to $500, with 17% spending more [13].
- Consequential Damage Costs: For issues like leaks, the damage extends beyond the initial fault. This includes repairing water-damaged drywall, flooring, or structural elements, and mold remediation. These costs can quickly become substantial, such as the $80,000 in damage from a hidden leak [4].
- Insurance Premium Increases: Frequent claims, particularly for water damage, can lead to higher insurance premiums or difficulty obtaining coverage.
- Lost Time and Disruption: Dealing with major repairs after the fact involves significant time, stress, and disruption to daily life.
- Reduced Property Value: Uncorrected defects or chronic issues can deter future buyers or reduce the appraised value of the home.
- Health Impacts: Mold growth from unaddressed moisture can lead to respiratory problems and other health issues.
Table 1 summarizes common problems and their potential costs, highlighting why early intervention is critical:
| Problem Area | Common Post-Remodel Issues | Potential Cost if Unaddressed | Prevention through Early Action |
|---|---|---|---|
| Plumbing | Minor fixture leaks, pipe leaks inside walls/floors, poor drainage, low water pressure [8] | $500 - $80,000+ (mold, rot, structural damage, water damaged finishes) [4] | Systematic testing of all fixtures, checking for drips, using paper towel test, calling contractor for any sign of leak [18] |
| Electrical | Outlets/switches not working, flickering lights, frequently tripping breakers, hot outlets [8] | $100 - $5,000+ (appliance damage, fire risk, extensive rewiring) | Testing all outlets and switches, using various appliances on new circuits, promptly reporting intermittent faults |
| Finishes (Paint, Grout, Caulk) | Hairline cracks, nail pops, uneven texture, peeling, loose tiles, sticky doors/drawers [7] | $50 - $2,000+ (re-painting entire area, water damage through unsealed cracks, re-tiling sections, carpenter fees) | Detailed visual inspection, photo documentation, reporting issues for touch-ups within warranty [8] |
| Environmental Adaptation | Warping wood (floors, cabinets), excessive dust, persistent condensation/mildew [9] | $200 - $10,000+ (floor/cabinet replacement, duct cleaning, chronic mold remediation) [19] | Maintaining stable humidity, using appropriate ventilation, changing HVAC filters, reporting persistent moisture signs |
By understanding these common problem areas and the financial ramifications of ignoring them, homeowners can approach the first 30 days post-remodel with a proactive mindset. This period is not merely a time to enjoy the new space, but rather a final, critical phase of quality assurance.
Next, we will explore the importance of ongoing communication with the contractor and how leveraging warranties and follow-up services can effectively resolve issues identified during this crucial initial month.
8. Homeowner Satisfaction and Avoiding Rework Expenses
Home remodeling projects represent a significant investment for homeowners, with Americans spending approximately $603 billion on these projects in 2024 alone[1]. The goal of any remodel is to enhance living spaces and improve property value. For the most part, homeowners are satisfied with the results of their renovations. A 2025 National Association of Realtors (NAR) survey found that 81% of homeowners reported feeling happy or satisfied with their completed renovation, with an average "Joy Score" of 8.2 out of 10[2]. This positive sentiment highlights the rewarding nature of a successful project. However, achieving and maintaining this satisfaction beyond the final walkthrough depends heavily on post-completion monitoring. The initial 30 days after a remodel are especially important. During this period, small, often hidden, issues may surface as new materials settle and systems are put to use. Catching these problems early is crucial to prevent them from growing into costly rework expenses and to ensure lasting homeowner satisfaction.
The financial implications of ignoring early signs of trouble are substantial. Rework and incomplete items account for about 9% of total construction spending worldwide[3], which translates to an estimated $625 billion lost annually on defect repairs[4]. For individual homeowners, an undetected issue can lead to devastating costs. For example, a hidden plumbing leak in a new addition caused $80,000 in damage, forcing the homeowner to gut and redo a significant portion of their recently completed project[5]. Such cases underline why proactive monitoring, diligent testing, and thorough documentation in the first month are not merely good practice but essential safeguards against dissatisfaction and unexpected financial burdens.
Inspect New Finishes and Materials in the First Month
The period immediately following a renovation is a time for materials to settle and adjust. New paint, sealants, wood, and other finishes require days or weeks to fully cure and harden[6]. During this phase, it is common for minor imperfections to appear. These might include hairline cracks in caulk around a bathtub, slight shrinkage in grout lines, or even small bulges in drywall surfaces known as nail pops[7]. These issues arise as wood framing dries out or as various materials acclimate to the home's environment[8]. While these flaws are often cosmetic, they can lead to bigger problems if not addressed. For example, a small caulk separation can widen over time, potentially allowing moisture intrusion.
Homeowners should perform detailed visual inspections of all new surfaces and junctions during the first weeks after construction. Attention to detail is important. Inspect corners, trim, grout joints, and seams for any signs of cracking or separation[9]. It is important not to dismiss these small changes, thinking they are insignificant. What starts as a minor defect can worsen if not repaired. Most reputable contractors expect some of these issues to surface and will perform free touch-ups under warranty. Documenting each issue with a photograph and date is a good practice. This log helps homeowners track if a problem grows and provides proof for warranty claims. If a crack remains small, it might only need a simple patch or caulk. However, if it enlarges or new cracks emerge, it could signal a deeper structural or moisture problem.
Environmental conditions also influence how new materials settle. Large changes in indoor humidity and temperature during the first month can exacerbate material movement[10]. For instance, high humidity in a newly remodeled bathroom can cause wood elements to swell and caulk to separate. Maintaining moderate humidity, ideally between 40-50%, and ensuring consistent ventilation can minimize these movements[11].
Table 8.1: Common Post-Remodel Finish Issues and Causes
| Issue Type | Common Causes in First 30 Days | Impact if Ignored |
|---|---|---|
| Hairline cracks in caulk/grout | Material settling, curing, temperature/humidity changes | Moisture intrusion, mold, larger cracks |
| Drywall nail pops | Wood framing drying and shrinking | Unsightly bulges, potential for paint chipping |
| Paint peeling/cracking | Improper surface preparation, rapid drying, moisture | Unsightly, further peeling, substrate damage |
| Wood gaps (cabinets, floors) | Wood acclimating to indoor humidity, drying | Aesthetic appeal reduced, potential for structural weakness |
For homeowners, being vigilant in the first 30 days is a sound investment of time. Raising concerns calmly with the contractor is not being "picky." It is a necessary step to ensure the quality of the work. Contractors benefit when clients report issues early. Addressing a minor defect like a cracked grout line now is more efficient and costs less than responding to a major water damage claim months later. Such proactive engagement enhances client satisfaction, which often leads to positive reviews and referrals[12].
Test All Systems, Fixtures, and Appliances Thoroughly
The first month after a remodel is the ideal time to test every new or modified system and fixture. A significant number of post-remodel problems involve plumbing or electrical systems that do not function as expected[13]. For example, testing all aspects of a newly renovated bathroom means flushing toilets multiple times, running showers, filling and draining bathtubs, and checking under sinks for leaks[14]. Even a slow drip under a sink can lead to serious hidden water damage, such as mold or rot, if not caught early. Water damage is a prevalent and costly concern, accounting for 38% of home insurance claims in some regions[15]. An instance in Atlanta involved a hot water line that was improperly fitted in a new bathroom addition, causing $80,000 in damage because leaks were not detected immediately[16].
It is important to test all new appliances through their various cycles. The dishwasher should run a full wash, and the washing machine should complete a load of laundry. Ovens should be tested at high temperatures. These initial uses are often when installation faults become clear. Electrical systems also demand careful checks. Every light switch should be activated, and every outlet tested. A simple outlet tester can verify proper wiring and detect issues like reversed polarity or tripped ground-fault circuit interrupters (GFCIs). Finding these issues early prevents safety hazards and inconvenient failures down the line.
Homeowners should pay close attention to unusual sounds, smells, or performance during these tests. Gurgling sounds in drains might suggest venting problems. A faint sewer smell when using a sink can indicate a dry P-trap or a larger vent issue. Circuit breakers tripping when a new outlet is used point to potential overloading or electrical faults. These signs should be reported immediately to the contractor.
Table 8.2: Essential Systems and Fixtures to Test in the First 30 Days
| System/Fixture | Specific Tests | Indicators of Problem |
|---|---|---|
| Plumbing (Sinks, Tubs, Showers, Toilets) | Run water at full pressure, flush, fill/drain, check under pipes | Leaks, slow drainage, weak water pressure, unusual noises |
| Appliances (Dishwasher, Washer, Oven) | Run through full cycles, test all settings | Failure to operate, improper temperature, unusual noises, leaks |
| Electrical (Outlets, Lights) | Plug in devices, flip all switches, use outlet tester | No power, flickering lights, tripped breakers, incorrect wiring |
| Ventilation (Exhaust Fans) | Run for extended periods during use (e.g., shower) | Lingering steam/odors, persistent condensation, mildew |
| HVAC (Thermostat, Vents) | Test heating/cooling, check airflow from new vents | Uneven heating/cooling, unusual noises, drafts |
These systematic checks, though seemingly minor, protect the homeowner's investment. Resolving issues under warranty immediately avoids significant personal costs and potential damage. For example, tightening a slightly loose pipe now is much simpler and cheaper than repairing water-damaged cabinets or flooring months later. For contractors, encouraging these tests and providing a checklist can demonstrate professionalism and reduce future liability. It is more cost-effective and reputation-building to correct a small mistake promptly than to deal with a major failure that could lead to public complaints.
Document and Organize All Remodel Information
Effective documentation is a critical, yet often overlooked, part of post-remodel success. Once a project is finished, homeowners receive a wealth of information including product manuals, care instructions, warranties, and possibly updated plans. Organizing this material keeps homeowners informed and prepared for future needs or issues. Experts recommend creating a "homeowner turnover folder" or digital file as soon as the project concludes[17].
This folder should contain:
- Contractor invoices and contact information.
- A detailed list of materials and finishes used, including specific brand names, model numbers, color codes, and any specific care instructions[18].
- Manuals and warranty cards for all new appliances, fixtures, and systems.
- Permit sign-offs and inspection approvals, if the project required them.
- "After" photos of all finished work. These provide baseline images to compare against if future issues arise[19].
Having clear records enables homeowners to use product and workmanship warranties effectively. Most remodel contracts include a warranty, typically one year for labor and materials[20]. Some contractors, like Phoenix Home Remodeling, offer extended warranties, such as a 2-year labor warranty[21]. To make a claim, proof of what was installed and when is essential. For example, if a new faucet begins to leak after several months, having the product information and warranty details makes it easier to obtain a replacement from the manufacturer or a repair from the contractor. It is also important to register new appliances and fixtures for warranty coverage, as some manufacturers require this within a specific timeframe.
Some remodeling firms, such as Phoenix Home Remodeling, provide clients with access to an online remodel portal. This portal stores progress photos and documents, allowing homeowners to download final plans or specifications for their records[22]. This digital approach complements physical documentation and ensures information is readily available. Furthermore, maintaining a log of any issues discovered in the first 30 days, complete with dates, descriptions, and communication records with the contractor, creates a valuable "paper trail." This proves that issues were noticed and reported within the warranty period.
For homeowners, organized documentation provides security and reduces stress. It ensures that if something goes wrong, they have all the necessary information to address it. This also assists with routine maintenance; knowing precise paint colors or tile specifications simplifies touch-ups or repairs. For contractors, providing a comprehensive documentation package improves client satisfaction and trust. It reduces follow-up calls seeking product information, saving time and resources. Clear documentation also helps protect contractors by providing written evidence of care instructions, which can be important if a product fails due to homeowner misuse or lack of maintenance. Ultimately, good records provide a safety net, keeping all parties informed and accountable.
Embrace Gentle Maintenance and Environmental Control
A newly remodeled space needs careful handling during its first month. New materials like paint, sealants, wood finishes, and adhesives need time to fully cure or harden, a process that can take days or weeks[23]. During this initial period, it is important to treat new surfaces gently. Cleaning guides often recommend using mild soap and water or only manufacturer-approved cleaners, avoiding harsh chemicals or abrasive scrubbers that could damage still-curing finishes[24]. For example, aggressive scrubbing of new grout or using strong cleaners on a freshly sealed countertop can cause irreversible damage. New hardwood floors or carpets also require specific, gentle initial care. New carpets, for instance, shed fibers significantly in the first month and benefit from frequent, light vacuuming to prevent matting and improve air quality.
Environmental control is equally important. Maintaining consistent indoor humidity (ideally 35-50%) is important for new wood products, such as flooring and cabinets. Wide fluctuations in humidity can cause wood to expand or contract, leading to gaps or warping. Using exhaust fans in bathrooms and kitchens is important, and a humidifier or dehumidifier may be needed depending on the climate. Temperature extremes can also impact curing materials, so it is necessary to avoid drastic temperature changes in the newly remodeled space. Ensuring good ventilation is important, especially after painting or installing new cabinetry, as materials may off-gas volatile organic compounds (VOCs). Opening windows and using exhaust fans helps dissipate these compounds and promotes proper curing.
Post-construction dust can linger for weeks. Homeowners should check their HVAC filters immediately after a remodel and replace them if they are clogged with dust. Running the HVAC fan or an air purifier helps capture remaining airborne particles. Some contractors offer a complimentary professional cleaning a few weeks after project completion, knowing that fine dust will continue to settle. If not, homeowners may consider a deep cleaning or duct cleaning. Furthermore, vigilance for mold or moisture is critical. Persistent condensation on new windows or recurring mildew spots in a new bathroom, even after cleaning, can indicate insufficient ventilation or other moisture problems. Addressing these early, possibly through a fan upgrade or improved caulking, prevents more serious issues later.
For homeowners, gentle care protects the initial quality of the remodel. Following specific care instructions for each finish helps prevent accidental damage. Understanding and controlling the home’s climate in the first month can prevent issues like warping, mold, or dulling finishes. For remodelers, educating clients on post-project maintenance reduces call-backs for preventable issues and reinforces their commitment to quality. When customers understand how to care for their new space, it increases the likelihood of long-term satisfaction and reduces warranty claims that stem from improper use or maintenance. The first month is a critical "break-in" period, ensuring a smooth transition from fresh construction to a fully integrated and well-maintained living space.
Communicate Issues Promptly and Leverage Warranties/Follow-Ups
Effective communication between the homeowner and the contractor should not conclude with the final payment. The weeks immediately following project completion are often seen as an extension of the service period. Homeowners should report any issues as soon as they are noticed. This could be anything from a cabinet door that rubs, a loose tile, or peeling paint. These concerns, if legitimate and within the project's scope, are typically covered by the contractor's warranty or implied by good faith. For instance, Phoenix Home Remodeling includes a final walkthrough and allows clients to compile any concerns. They also back their work with a 2-year labor warranty, encouraging homeowners to contact them if issues arise[25]. This willingness to address post-completion problems is characteristic of quality-focused businesses.
Delaying communication can complicate matters. If issues are allowed to worsen or are reported much later, a contractor might argue that the damage was due to homeowner negligence or that the warranty period has expired. A timely call or email documenting the issue prompts an appropriate response, whether it is a repair appointment or simply noting the concern for the record. This creates a documented history of communication which can be valuable if further action is needed.
Understanding and activating warranties are important during this period. Most remodel contracts include a warranty, with one year on labor and materials being common[26]. Some product components, such as windows or roofing materials, may carry longer manufacturer warranties. The first 30 days provide a window to register these products for warranty coverage, which is often required to make a claim. If a new product, like a water heater, fails early on, it is likely fully covered. Homeowners should also inform their contractor about product failures, as they can often coordinate replacements efficiently. It is also important to remember that some warranties require specific maintenance-documenting that these maintenance instructions were followed can strengthen a claim. Additionally, homeowners should be aware of any specific reporting deadlines within their contract or local regulations. Compiling a "punch list" of all issues within the first month and formally submitting it to the contractor establishes clear expectations for fixes.
A growing trend in the remodeling industry is proactive post-project follow-up from contractors. This might involve a phone call, an email, or even an in-person visit a month or a few months after completion. Such follow-ups increase client satisfaction, lead to more positive reviews, and generate referrals[27]. From the client's perspective, this demonstrates that the contractor is committed to long-term satisfaction, not just the final payment. If a contractor does not initiate a follow-up, homeowners should feel comfortable requesting a 30-day inspection. Many contractors will agree, especially if a small portion of the final payment is held back until complete satisfaction. During such a visit, minor issues like a rubbing cabinet door might be fixed on the spot, or a faulty electrical dimmer replaced. This protects the project's quality and reinforces client trust.
For homeowners, speaking up and utilizing warranties is important to ensure they receive the quality of work they paid for. Approaching these conversations professionally helps maintain a productive relationship. For contractors, making the first 30 days an extended phase of project completion helps distinguish their service. Resolving issues quickly enhances client satisfaction, leading to positive testimonials and repeat business. If a small plumbing leak is fixed immediately, it prevents a costly and damaging problem later. In essence, the first month after a remodel is not an endpoint, but a critical final chapter where quality is confirmed, loose ends are addressed, and long-term homeowner peace of mind is established.
Notable Examples: The Impact of Early Detection and Communication
Major Plumbing Leak Caught Too Late - Atlanta, GA (2025)
Jenny Warner, an interior designer in Atlanta, faced a dire situation after a $38,000 home addition. Weeks after completion, she noticed a slight warping in her new hardwood floors[28]. Investigation revealed a hidden plumbing leak saturating the structure. The cause was an improperly drilled hole for a hot water line near a shower valve; the pipe had been forced at an incorrect angle, eventually rupturing[29]. Water seeped through foam insulation into the ceilings below for days before discovery[30]. The outcome was catastrophic: walls, floors, and ceilings required replacement. The new bathroom, including custom elements, had to be completely gutted and redone after being soaked[31]. Remediation and repair costs reached approximately $80,000, far exceeding the original project cost[32]. Warner described feeling "completely sick" about her dream project turning into months of painful repairs[33]. This example highlights the devastating consequences of delayed leak detection. Early identification of the floor cupping or a drip could have significantly minimized the damage. It also suggests that even with inspections during construction, poor workmanship can go unnoticed[34]. Homeowners might consider a post-completion inspection by a third-party for additional assurance on complex projects.
Quick Fix Saves New Kitchen - Calgary, Canada (2023)
In a more positive instance, a homeowner in Calgary, Canada, completed a kitchen remodel and followed advice to be closely observant during the first month. A week after completion, she placed a paper towel under the U-bend of her new sink's drain pipe, a simple leak detection method suggested by her contractor[35]. Days later, she found a small mark of water on the paper. It was a slightly loose compression fitting on the drain. She contacted her contractor, who responded the next day, tightening the fitting and adding Teflon tape. The early detection prevented any damage. During the same visit, the plumber also fixed a kink in the new dishwasher's drain hose that was causing incomplete draining. This case demonstrates how proactive homeowner testing and prompt contractor response prevented what could have been expensive damage. Catching a tiny leak in "day 7" versus "day 70" meant the fix was quick and covered under warranty. This also built trust, leading to a positive review for the contractor, Phoenix Home Remodeling, for their quick, hassle-free resolution of a minor issue.
Ventilation Oversight Leads to Mold - Hartford, CT (2026)
A family in Hartford, CT, remodeled their primary bathroom, including a new shower and exhaust fan. In the first month, they noticed persistent black spots of mildew reappearing on the new caulking and ceiling above the shower, even after cleaning[36]. Recognizing this as abnormal for a new bathroom, they contacted their remodeler. An investigation revealed that despite the new fan's power rating, a long duct run with a bend significantly reduced its actual air extraction. The bathroom was not venting steam effectively, creating excessive moisture and rapid mildew growth. The contractor addressed the issue by installing a second intake vent closer to the shower and upgrading the fan motor. Once fixed, the mildew ceased to return. The contractor also re-caulked the affected areas under warranty. This case highlights how moisture problems can appear quickly after a remodel, sometimes stemming from design or installation flaws rather than user error. Persistent condensation or mildew early on serves as a clear indicator that ventilation or other factors need adjustment. Addressing such performance concerns promptly, especially when they fall under warranty, protects health and investment by preventing mold and more significant damage. This example shows the importance of reporting performance concerns, not just aesthetic ones.
Exemplary Follow-Up by Remodeling Firm - Phoenix, AZ (2025)
After a substantial interior remodel of a 1980s home in Phoenix, including the kitchen, two bathrooms, and flooring, homeowners experienced the benefits of a contractor's proactive follow-up. Phoenix Home Remodeling schedules a 30-day post-project walkthrough. A month after completion, their project manager visited the homeowners. During this visit, they noted a few minor issues: a rubbing hallway cabinet door, a small crack in the shower's grout, and questions about a new programmable thermostat. The project manager spent two hours, adjusting the cabinet hinge, re-grouting the crack (explaining it was due to normal settling[37]), and instructing them on the thermostat. He also touched up caulk that had slightly separated from a countertop. The homeowners appreciated the thoroughness. This level of service resulted in a detailed 5-star review and two referrals to the company. This example shows how a proactive approach during the first 30 days can resolve minor issues smoothly, educate homeowners, and significantly boost client satisfaction and business growth. It also illustrates that small fixes are often a normal part of a thorough project completion, not necessarily a sign of poor quality.
The lessons from these examples are clear: vigilant observation, proactive testing, and open communication during the first 30 days after a remodel are essential. They safeguard the homeowner's investment, ensure long-term satisfaction, and prevent small issues from becoming significant, costly problems. Contractors who facilitate this process build trust and reputation, benefiting both their clients and their business longevity.
The following section will further consider the long-term impact on home value and equity.
Citations
- ^ "Remodeling Impact Report: Top Projects, Cost Recovery, and Owner Satisfaction - QUALIFIED REMODELER" (2025)
- ^ "Remodeling Impact Report: Top Projects, Cost Recovery, and Owner Satisfaction - QUALIFIED REMODELER" (2025)
- ^ "Construction Punch List Template: The Complete Closeout Checklist for Contractors in 2026 - Tasktag Blog" (2026)
- ^ "Construction Punch List Template: The Complete Closeout Checklist for Contractors in 2026 - Tasktag Blog" (2026)
- ^ "‘I felt completely sick’ - water damage wreaked… - Homes & Gardens / Yahoo News" (2025)
- ^ "Post Renovation Maintenance Checklist Calgary & Okotoks | Elevation Renovations" (2023)
- ^ "Post-Remodel Punch List: What to Watch for in the First 30 Days - Anderson Remodeling" (2025)
- ^ "Post Renovation Maintenance Checklist Calgary & Okotoks | Elevation Renovations" (2023)
- ^ "Post-Remodel Punch List: What to Watch for in the First 30 Days - Anderson Remodeling" (2025)
- ^ "Post Renovation Maintenance Checklist Calgary & Okotoks | Elevation Renovations" (2023)
- ^ "Post Renovation Maintenance Checklist Calgary & Okotoks | Elevation Renovations" (2023)
- ^ "Retention Marketing for Remodeling Contractors: Referrals, Reviews & Past Client Campaigns | Austin Web Services" (2026)
- ^ "Home Renovation Difficulties Poll (DIY vs Contractors) - Lenta News" (2023)
- ^ "Post-Remodel Punch List: What to Watch for in the First 30 Days - Anderson Remodeling" (2025)
- ^ "Insurance Claims Data - Water Damage Frequency (2024) - College of Insurers, Madrid" (2025)
- ^ "‘I felt completely sick’ - water damage wreaked… - Homes & Gardens / Yahoo News" (2025)
- ^ "Post Renovation Maintenance Checklist Calgary & Okotoks | Elevation Renovations" (2023)
- ^ "Post Renovation Maintenance Checklist Calgary & Okotoks | Elevation Renovations" (2023)
- ^ "Post Renovation Maintenance Checklist Calgary & Okotoks | Elevation Renovations" (2023)
- ^ "FAR 52.246-21 _Alternate I | Acquisition.GOV" (Accessed 2024)
- ^ "Remodel FAQ - Phoenix Home Remodeling" (Accessed 2024)
- ^ "Clear Communication - Phoenix Home Remodeling" (Accessed 2024)
- ^ "Post Renovation Maintenance Checklist Calgary & Okotoks | Elevation Renovations" (2023)
- ^ "Post-Remodel Punch List: What to Watch for in the First 30 Days - Anderson Remodeling" (2025)
- ^ "Remodel FAQ - Phoenix Home Remodeling" (Accessed 2024)
- ^ "FAR 52.246-21 _Alternate I | Acquisition.GOV" (Accessed 2024)
- ^ "Retention Marketing for Remodeling Contractors: Referrals, Reviews & Past Client Campaigns | Austin Web Services" (2026)
- ^ "‘I felt completely sick’ - water damage wreaked… - Homes & Gardens / Yahoo News" (2025)
- ^ "‘I felt completely sick’ - water damage wreaked… - Homes & Gardens / Yahoo News" (2025)
- ^ "‘I felt completely sick’ - water damage wreaked… - Homes & Gardens / Yahoo News" (2025)
- ^ "‘I felt completely sick’ - water damage wreaked… - Homes & Gardens / Yahoo News" (2025)
- ^ "‘I felt completely sick’ - water damage wreaked $80,000 of 'havoc' and months of 'painful' repairs on this devastated homeowner - Currently.att.yahoo.com" (2025)
- ^ "‘I felt completely sick’ - water damage wreaked $80,000 of 'havoc' and months of 'painful' repairs on this devastated homeowner - Currently.att.yahoo.com" (2025)
- ^ "‘I felt completely sick’ - water damage wreaked… - Homes & Gardens / Yahoo News" (2025)
- ^ "Your First 30 Days: Reset the House and Learn Its Habits - Service Atlas Blog" (2026)
- ^ "Your First 30 Days: Reset the House and Learn Its Habits - Service Atlas Blog" (2026)
- ^ "Post-Remodel Punch List: What to Watch for in the First 30 Days - Anderson Remodeling" (2025)
9. Frequently Asked Questions
Homeowners often have questions about what to do once a remodel is complete. The period immediately following a renovation, particularly the first 30 days, is important for ensuring the long-term quality and function of the work performed. This section addresses common concerns homeowners may have during this crucial time. It offers practical advice on what to monitor, test, and document to prevent minor issues from becoming major, costly problems. By understanding these actions, homeowners can protect their investment and maintain their newly improved home.
What common signs indicate a potential problem with a recent remodel?
Many common signs of potential problems appear within the first month after a remodel. These issues often relate to the settling of new materials or oversight during installation. Homeowners should pay close attention to several key areas.
Finishes and Materials
Fresh paint, caulk, and grout lines are particularly prone to showing minor flaws as they cure and materials settle. For instance, hairline cracks in caulk around a bathtub or sink are common. These can appear as caulk shrinks slightly while drying [1]. Similarly, grout lines in new tile installations may develop small cracks. Drywall can also show "nail pops," where screws or nails become visible due to the wood framing drying and shifting [5]. These are often cosmetic but need attention. Uneven paint or misaligned wallpaper are other finish-related problems. A 2023 poll showed that 24% of homeowners with remodel difficulties cited uneven wallpaper as a problem [8].
Water-Related Issues
Water leaks are a high concern after a remodel. They can cause significant damage if not caught early. Approximately 38% of home insurance claims involve water damage [4]. These claims account for over 42% of payout costs [4]. Homeowners should look for any signs of moisture, drips, or water stains under sinks, around toilets, or near new appliances like dishwashers and washing machines [1]. Even a slow drip can lead to widespread and expensive damage over time [4]. One homeowner experienced an estimated $80,000 in damage from a hidden plumbing leak in a new addition [4]. This was due to an improperly fitted hot water line [4]. Checking for drips daily in the first week, especially by placing paper towels under pipes, can help detect issues early [19].
A table summarizing common problem indicators:
| Area | Potential Problem Signs | Initial Action |
|---|---|---|
| Paint & Drywall | Hairline cracks, nail pops, uneven finish | Document, monitor growth, report for touch-ups |
| Caulk & Grout | Small cracks, separation, mold recurrence | Document, report, check ventilation |
| Plumbing | Drips, leaks, water stains, low pressure, gurgling sounds | Test all fixtures, place paper towels, check under sinks |
| Electrical | Outlets not working, flickering lights, tripping breakers | Test all outlets/switches, note affected fixtures |
| Appliances | Not draining, unusual noises, incorrect temperatures | Run through full cycles, check manuals for troubleshooting |
Electrical and Appliance Malfunctions
New electrical work should be tested thoroughly. Flickering lights, outlets that do not provide power, or frequently tripping circuit breakers can signal a problem. A 2023 poll found that 21% of remodel issues were electrical [8]. All new appliances should be run through their full cycles to ensure they function correctly. This includes dishwashers, washing machines, ovens, and refrigerators [1]. If an appliance fails to drain, heat properly, or makes unusual noises, it should be noted and reported.
Performance and Comfort Issues
Beyond visible flaws, homeowners should monitor the performance of new systems. For example, in a bathroom remodel, if condensation builds up excessively after a shower, or mildew reappears quickly despite cleaning, it may indicate insufficient ventilation [19]. One case involved a newly remodeled bathroom in Hartford where persistent mildew indicated an undersized exhaust fan [20]. Similarly, new windows or doors that stick, don't seal properly, or allow drafts indicate an installation issue. These performance problems, if observed in the first 30 days, should be brought to the contractor's attention.
How can homeowners effectively test new systems and fixtures?
Effective testing requires a systematic approach. Do not wait for problems to appear; actively look for them. The goal is to simulate normal use and observe how everything functions.
Plumbing Systems
For any area with new plumbing, such as bathrooms or kitchens, conduct thorough tests:
- Run all faucets: Check water pressure and temperature from both hot and cold taps [1]. Observe for any sluggish flow or sputtering that might indicate air in the lines or pressure issues.
- Flush toilets multiple times: Ensure they flush completely and refill correctly without continuously running.
- Fill tubs and sinks: Fill them completely, then let the water drain. Watch under the sink cabinets with a flashlight for any drips or puddles [1]. Place paper towels or toilet paper under all new connections (faucets, drains, supply lines) for several hours or overnight to catch slow leaks [19].
- Run showers: Operate the shower for several minutes. Check that the showerhead sprays evenly and that there are no leaks around the base or handles. Watch for water seeping out of the shower enclosure.
- Run appliances that use water: This includes dishwashers, washing machines, and ice makers. Run them through a full cycle and then check for leaks around their connections. The Calgary example showed a homeowner detecting a loose fitting in a new dishwasher's drain hose using this method [20].
Electrical Systems
Testing electrical components ensures safety and functionality:
- Test all outlets: Plug in a small appliance (like a phone charger or lamp) into every new outlet. For outlets in wet areas (kitchens, bathrooms, outdoors), press the "test" and "reset" buttons on Ground Fault Circuit Interrupter (GFCI) outlets to ensure they trip and reset properly.
- Check all switches: Turn on and off every light fixture and fan controlled by new switches. Note any flickering or delays.
- Verify circuit breakers: Know which breaker controls which part of the remodeled area. Intentionally trip a GFCI to see if the correct breaker responds. Monitor for any breakers that trip unexpectedly during normal use, as this could indicate an overload or electrical fault.
Heating, Ventilation, and Air Conditioning (HVAC)
If major modifications were made to the HVAC system, test its immediate performance:
- Thermostat function: Set the thermostat to different temperatures (both heating and cooling) to ensure the system responds as expected.
- Airflow: Check that air flows out of all new registers and returns to all new grilles.
- Humidity control: Monitor humidity levels, especially in remodeled areas with new wood finishes. Keep humidity near 35-50% [2]. Use kitchen and bathroom exhaust fans consistently to manage moisture.
What documentation should homeowners keep, and why is it important?
Comprehensive documentation is vital after a remodel. It serves as a record of the work, materials, and warranties, which can be crucial for future maintenance, repairs, or re-sale. Homeowners should create a dedicated "home file," either physical or digital, for all project-related information [2].
Key Documents to Keep
- Signed Contracts and Change Orders: These documents outline the scope of work, project costs, and any modifications agreed upon during the project. They serve as legal proof of the agreement.
- Invoices and Receipts: Keep records of all payments made to the contractor and any direct purchases of materials.
- Warranty Information: This is one of the most critical sets of documents.
- Contractor's Workmanship Warranty: Most remodelers offer at least a 1-year warranty on labor and installation [7]. Some, like Phoenix Home Remodeling, offer an extended 2-year labor warranty [9]. Note the coverage period and what it includes.
- Product and Appliance Warranties: Register all new appliances and specific products (e.g., HVAC units, water heaters, windows) with the manufacturer. Keep the warranty cards and user manuals [2].
- Material Specifications and Color Codes: Document the brand, model number, and color code for paint, tile, grout, flooring, and other finishes [2]. This simplifies future touch-ups or repairs if matching materials are needed.
- Appliance Manuals and Care Instructions: These provide specific cleaning and maintenance guidelines that preserve warranties and the life of products [2].
- Before and After Photos: Take wide-angle and close-up photos of the completed work. These serve as a visual record of the quality and condition of the remodel, which can be useful if defects appear later [2].
- Permits and Inspection Records: If the project required permits, keep copies of approved permits and official inspection reports. These demonstrate that the work was done to code.
- Communication Log: Keep a record of all emails, texts, and notes from phone calls with the contractor, especially regarding any issues or concerns raised after completion.
Why Documentation is Important
Proper documentation helps homeowners in several ways:
- Warranty Claims: Without proof of purchase or installation dates, filing a warranty claim for a faulty product or poor workmanship can be difficult.
- Dispute Resolution: Clear records protect homeowners in case of disagreements with the contractor over the quality of work or scope of the project.
- Maintenance and Repairs: Knowing exact paint colors or tile models simplifies future maintenance or matching repairs.
- Home Value: Comprehensive records can add value when selling the home, showing prospective buyers the quality of the recent renovations.
Some contractors, like Phoenix Home Remodeling, offer digital portals with project photos and documents, allowing homeowners to easily save plans and specifications [32].
The table below highlights essential documents and their uses:
| Document Category | Items to Include | Purpose |
|---|---|---|
| Contractual | Signed contract, change orders, invoices, payment records | Legal proof of agreement, financial record |
| Warranties | Contractor workmanship warranty, product/appliance warranties, registration cards | Enable free repairs/replacements within coverage period |
| Materials & Finishes | Paint codes, tile type/color, flooring specs, cabinet details | Facilitate future repairs, touch-ups, or matching |
| Manuals | Appliance user manuals, care instructions for surfaces | Guide proper usage and maintenance, preserve warranties |
| Visual Records | Before-and-after photos, videos of completed work | Evidence of installation and initial condition |
| Regulatory | Permits, inspection reports, certificates of occupancy | Proof of code compliance and safety |
| Communication | Emails, texts, notes from conversations with contractor | Record of discussions and issue reporting |
What are the best practices for maintenance in the first 30 days?
The first 30 days after a remodel are a "break-in" period for new materials. During this time, gentle maintenance and environmental control are crucial to allow materials to fully cure and settle [2].
Gentle Cleaning
- Avoid harsh chemicals: New surfaces, especially sealed countertops, painted walls, or freshly grouted tiles, can be sensitive. Harsh cleaners can etch surfaces, strip sealants, or damage finishes [1]. Use mild soap and water or cleaners specifically recommended by the manufacturer.
- No aggressive scrubbing: Refrain from scrubbing new grout or painted surfaces with abrasive pads or brushes, as this can wear down the finish prematurely.
- Follow specific instructions: Many materials have specific curing times before they can withstand heavy cleaning. For instance, some hardwood floor finishes require a few weeks before wet mopping is advised. New carpets may shed fibers and require frequent vacuuming in the first month to remove loose particles and prevent matting.
Environmental Control
Maintaining a stable indoor environment is critical for material stability:
- Humidity control: Many remodel projects involve new wood products (flooring, cabinets) and drywall. Large swings in humidity can cause these materials to expand, contract, warp, or crack [2]. Aim to keep indoor relative humidity between 35% and 50% [2]. Use exhaust fans in kitchens and bathrooms to remove moisture [2]. In dry climates or seasons, a humidifier may be needed; in humid conditions, a dehumidifier can help.
- Temperature stability: Avoid extreme temperature fluctuations. Do not let a newly renovated space become very hot or cold immediately after work is done, as this can also affect curing and material movement.
- Ventilation: New paint and cabinetry can release volatile organic compounds (VOCs). Keep the remodeled area well-ventilated by opening windows (if weather permits) and running exhaust fans for the first few days to a week. This improves air quality and aids in curing paint and sealants.
Dust Management
Construction dust can linger for weeks.
- HVAC filter check: Check and replace your HVAC filter shortly after the remodel is complete, as it may be clogged with construction dust [2]. Running the HVAC fan or an air purifier can help capture any remaining fine particles.
The "soft opening" approach to a remodeled space helps ensure its longevity and prevents self-inflicted damage. It is about easing the new components into regular use under controlled conditions [2].
When and how should homeowners communicate issues to their contractor?
Homeowners should communicate any issues promptly and formally. Waiting to report problems can complicate the resolution process.
Timing of Communication
- As soon as possible: Report any significant discoveries (e.g., a leak, a non-functioning appliance) immediately. For minor cosmetic issues, gather a list of items over the first few weeks [1].
- Within the warranty period: Be aware of your contractor's warranty timeframe, which is typically one year for labor and materials [7], though some, like Phoenix Home Remodeling, offer a 2-year labor warranty [9]. All issues should be reported within this period to ensure coverage.
- Proactive check-ins: Some contractors schedule a 30-day or 3-month follow-up visit. If yours does not, consider requesting one around the 30-day mark. This allows for a joint inspection of any emerging issues [21].
Method of Communication
- Written communication: While phone calls for initial reports can be fine, always follow up with an email or a formal letter. This creates a written record (a "paper trail") of when the issue was reported and what was discussed.
- Be specific: Describe the problem clearly. Include details like the location, date observed, and any relevant observations (e.g., "The faucet in the master bathroom drips consistently after every use," "The paint on the south wall of the kitchen appears uneven near the ceiling").
- Include documentation: Attach photos or videos of the issue. A picture of a cracked tile or a leaking pipe provides clear evidence [2].
- Be professional: Maintain a calm and professional tone, even if frustrated. Most reputable contractors want to resolve issues to maintain their reputation and customer satisfaction [11].
Leveraging Warranties and Contractor Follow-Ups
Remember that most issues that appear in the first 30 days are likely covered by the contractor's warranty or are considered punch list items. Contractors who perform follow-ups often see increased customer satisfaction, leading to 3 times more Google reviews and 2 times more referrals [11]. This willingness to address post-completion issues is good for both the client and the business. As the Phoenix Home Remodeling example showed, a proactive 30-day walkthrough resolved minor issues promptly and boosted client satisfaction [21].
The final stage of a remodel is not when the crew leaves, but when all settling issues are addressed and the homeowner is fully content with the finished product. By asking questions, being observant, and communicating effectively, homeowners can ensure their remodel meets expectations and lasts for years.
References
- Post-Remodel Punch List: What to Watch for in the First 30 Days - Anderson Remodeling
- Post-Remodel Punch List: What to Watch for in the First 30 Days - Anderson Remodeling
- Post Renovation Maintenance Checklist Calgary & Okotoks | Elevation Renovations
- El 38,2 % de los siniestros de hogar corresponde a daños por agua - Colegio de Mediadores de Seguros de Madrid
- El 38,2 % de los siniestros de hogar corresponde a daños por agua - Colegio de Mediadores de Seguros de Madrid
- ‘I felt completely sick’ – water damage wreaked…
- ‘I felt completely sick’ – water damage wreaked…
- Post-Remodel Punch List: What to Watch for in the First 30 Days - Anderson Remodeling
- Post Renovation Maintenance Checklist Calgary & Okotoks | Elevation Renovations
- Post Renovation Maintenance Checklist Calgary & Okotoks | Elevation Renovations
- Post Renovation Maintenance Checklist Calgary & Okotoks | Elevation Renovations
- Post-Remodel Punch List: What to Watch for in the First 30 Days - Anderson Remodeling
- Remodeling Impact Report: Top Projects, Cost Recovery, and Owner Satisfaction - QUALIFIED REMODELER
- 住宅をリフォームしたことのある方が、次に住宅をリフォームする機会があった際、業者選びで重要視するのは「施行実績」!株式会社中村建硝が「住宅リフォーム会社の選び方」に関する調査を実施! | 株式会社中村建硝のプレスリリース
- Россияне назвали самые частые проблемы при ремонте: Дом: Среда обитания: Lenta.ru
- Россияне назвали самые частые проблемы при ремонте: Дом: Среда обитания: Lenta.ru
- Retention Marketing for Remodeling Contractors: Referrals, Reviews & Past Client Campaigns | Austin Web Services | Austin Web Services
- Remodel FAQ - Phoenix Home Remodeling
- Construction Punch List Template: The Complete Closeout Checklist for Contractors in 2026
- Remodeling Impact Report: Top Projects, Cost Recovery, and Owner Satisfaction - QUALIFIED REMODELER
- Remodeling Impact Report: Top Projects, Cost Recovery, and Owner Satisfaction - QUALIFIED REMODELER
- Construction Punch List Template: The Complete Closeout Checklist for Contractors in 2026
- Construction Punch List Template: The Complete Closeout Checklist for Contractors in 2026
- Россияне назвали главные проблемы при ремонте | РБК Недвижимость
- Россияне назвали главные проблемы при ремонте | РБК Недвижимость
- Россияне назвали самые частые проблемы при ремонте: Дом: Среда обитания: Lenta.ru
- Россияне назвали самые частые проблемы при ремонте: Дом: Среда обитания: Lenta.ru
- Post-Remodel Punch List: What to Watch for in the First 30 Days - Anderson Remodeling
- Post Renovation Maintenance Checklist Calgary & Okotoks | Elevation Renovations
- Post Renovation Maintenance Checklist Calgary & Okotoks | Elevation Renovations
- El 38,2 % de los siniestros de hogar corresponde a daños por agua - Colegio de Mediadores de Seguros de Madrid
- El 38,2 % de los siniestros de hogar corresponde a daños por agua - Colegio de Mediadores de Seguros de Madrid
- 52.246-21_Alternate I | Acquisition.GOV
- Remodel FAQ - Phoenix Home Remodeling
- Retention Marketing for Remodeling Contractors: Referrals, Reviews & Past Client Campaigns | Austin Web Services | Austin Web Services
- Post Renovation Maintenance Checklist Calgary & Okotoks | Elevation Renovations
- Post Renovation Maintenance Checklist Calgary & Okotoks | Elevation Renovations
- Post Renovation Maintenance Checklist Calgary & Okotoks | Elevation Renovations
- Remodeling Impact Report: Top Projects, Cost Recovery, and Owner Satisfaction - QUALIFIED REMODELER
- Remodeling Impact Report: Top Projects, Cost Recovery, and Owner Satisfaction - QUALIFIED REMODELER
- 住宅をリフォームしたことのある方が、次に住宅をリフォームする機会があった際、業者選びで重要視するのは「施行実績」!株式会社中村建硝が「住宅リフォーム会社の選び方」に関する調査を実施! | 株式会社中村建硝のプレスリリース
- 住宅をリフォームしたことのある方が、次に住宅をリフォームする機会があった際、業者選びで重要視するのは「施行実績」!株式会社中村建硝が「住宅リフォーム会社の選び方」に関する調査を実施! | 株式会社中村建硝のプレスリリース
- Аналитики выяснили, скольким россиянам пришлось переделывать ремонт в квартире - газета BN.ru
- Аналитики выяснили, скольким россиянам пришлось переделывать ремонт в квартире - газета BN.ru
- Россияне рассказали, сколько потратили на переделку ремонта | РБК Недвижимость
- Post Renovation Maintenance Checklist Calgary & Okotoks | Elevation Renovations
- Post-Remodel Punch List: What to Watch for in the First 30 Days - Anderson Remodeling
- Post Renovation Maintenance Checklist Calgary & Okotoks | Elevation Renovations
- Post Renovation Maintenance Checklist Calgary & Okotoks | Elevation Renovations
- Post-Remodel Punch List: What to Watch for in the First 30 Days - Anderson Remodeling
- Post-Remodel Punch List: What to Watch for in the First 30 Days - Anderson Remodeling
- Post-Remodel Punch List: What to Watch for in the First 30 Days - Anderson Remodeling
- Post Renovation Maintenance Checklist Calgary & Okotoks | Elevation Renovations
- Post Renovation Maintenance Checklist Calgary & Okotoks | Elevation Renovations
- Retention Marketing for Remodeling Contractors: Referrals, Reviews & Past Client Campaigns | Austin Web Services | Austin Web Services
- Россияне назвали самые частые проблемы при ремонте: Дом: Среда обитания: Lenta.ru
- Россияне назвали самые частые проблемы при ремонте: Дом: Среда обитания: Lenta.ru
- Post-Remodel Punch List: What to Watch for in the First 30 Days - Anderson Remodeling
- El 38,2 % de los siniestros de hogar corresponde a daños por agua - Colegio de Mediadores de Seguros de Madrid
- ‘I felt completely sick’ – water damage wreaked…
- ‘I felt completely sick’ – water damage wreaked…
- Hartford Home Cleaning Guide for New Homeowners | Service Atlas Blog
- El 38,2 % de los siniestros de hogar corresponde a daños por agua - Colegio de Mediadores de Seguros de Madrid
- Post Renovation Maintenance Checklist Calgary & Okotoks | Elevation Renovations
- Post Renovation Maintenance Checklist Calgary & Okotoks | Elevation Renovations
- Clear Communication - Phoenix Home Remodeling
- Clear Communication - Phoenix Home Remodeling
- Post Renovation Maintenance Checklist Calgary & Okotoks | Elevation Renovations
- 52.246-21_Alternate I | Acquisition.GOV
- Remodel FAQ - Phoenix Home Remodeling
- Post Renovation Maintenance Checklist Calgary & Okotoks | Elevation Renovations
- Post-Remodel Punch List: What to Watch for in the First 30 Days - Anderson Remodeling
- Post-Remodel Punch List: What to Watch for in the First 30 Days - Anderson Remodeling
- Post Renovation Maintenance Checklist Calgary & Okotoks | Elevation Renovations
- Post Renovation Maintenance Checklist Calgary & Okotoks | Elevation Renovations
- Hartford Home Cleaning Guide for New Homeowners | Service Atlas Blog
- Remodel FAQ - Phoenix Home Remodeling
- 52.246-21_Alternate I | Acquisition.GOV
- Retention Marketing for Remodeling Contractors: Referrals, Reviews & Past Client Campaigns | Austin Web Services | Austin Web Services
- ‘I felt completely sick’ – water damage wreaked…
- ‘I felt completely sick’ – water damage wreaked…
- ‘I felt completely sick’ – water damage wreaked…
- ‘I felt completely sick’ – water damage wreaked…
- ‘I felt completely sick’ – water damage wreaked…
- ‘I felt completely sick’ – water damage wreaked…
- ‘I felt completely sick’ – water damage wreaked…
- ‘I felt completely sick’ – water damage wreaked $80,000 of 'havoc' and months of 'painful' repairs on this devastated homeowner
- ‘I felt completely sick’ – water damage wreaked $80,000 of 'havoc' and months of 'painful' repairs on this devastated homeowner
- ‘I felt completely sick’ – water damage wreaked $80,000 of 'havoc' and months of 'painful' repairs on this devastated homeowner
- ‘I felt completely sick’ – water damage wreaked…
- Hartford Home Cleaning Guide for New Homeowners | Service Atlas Blog
- Hartford Home Cleaning Guide for New Homeowners | Service Atlas Blog
- Post-Remodel Punch List: What to Watch for in the First 30 Days - Anderson Remodeling
- Post-Remodel Punch List: What to Watch for in the First 30 Days - Anderson Remodeling
- Post-Remodel Punch List: What to Watch for in the First 30 Days - Anderson Remodeling
- Post Renovation Maintenance Checklist Calgary & Okotoks | Elevation Renovations
- Post Renovation Maintenance Checklist Calgary & Okotoks | Elevation Renovations
- Hartford Home Cleaning Guide for New Homeowners | Service Atlas Blog
- Hartford Home Cleaning Guide for New Homeowners | Service Atlas Blog
- ‘I felt completely sick’ – water damage wreaked…
- ‘I felt completely sick’ – water damage wreaked…
- Construction Punch List Template: The Complete Closeout Checklist for Contractors in 2026
- Remodeling Impact Report: Top Projects, Cost Recovery, and Owner Satisfaction - QUALIFIED REMODELER
- Remodeling Impact Report: Top Projects, Cost Recovery, and Owner Satisfaction - QUALIFIED REMODELER
- Россияне назвали главные проблемы при ремонте | РБК Недвижимость
- Россияне назвали самые частые проблемы при ремонте: Дом: Среда обитания: Lenta.ru
- Remodel FAQ - Phoenix Home Remodeling
- El 38,2 % de los siniestros de hogar corresponde a daños por agua - Colegio de Mediadores de Seguros de Madrid
- Retention Marketing for Remodeling Contractors: Referrals, Reviews & Past Client Campaigns | Austin Web Services | Austin Web Services
- リフォーム・リノベーション経験者の約1割が仕上がりに不満、具体的には? | マイナビニュース
- 住宅をリフォームしたことのある方が、次に住宅をリフォームする機会があった際、業者選びで重要視するのは「施行実績」!株式会社中村建硝が「住宅リフォーム会社の選び方」に関する調査を実施! | 株式会社中村建硝のプレスリリース
- Аналитики выяснили, скольким россиянам пришлось переделывать ремонт в квартире - газета BN.ru
- Россияне рассказали, сколько потратили на переделку ремонта | РБК Недвижимость